
Recovery Factor Calculation for Smart Traders
Master the recovery factor calculation to measure a strategy's resilience. Learn the formula, see DeFi examples, and find top wallets with Wallet Finder.ai.

June 20, 2026


Wallet Finder
May 12, 2026

You're likely in one of two positions right now. You found a token early, watched it rip, then gave back most of the move because you had no plan after the buy. Or you keep studying wallets, charts, releases, and narratives, but your PnL still feels random because execution falls apart once volatility hits.
That gap is usually position management. Not token discovery. Not faster hot takes. Not another thread about “conviction.”
A lot of traders can spot a strong setup. Fewer can size it correctly, survive the drawdown, avoid getting chopped by noise, and exit without turning a winner into dead capital. On-chain, that problem gets worse because gas, slippage, and MEV punish sloppy decisions immediately.
A trader buys a small cap token before the crowd notices. The thesis is right. Liquidity is flowing in, social attention is building, and the chart confirms. For a while, it looks like one of those rare clean wins.
Then the usual mistakes show up.
He sizes too big because the first candle validates him. When price pulls back, he can't tell whether it's normal volatility or thesis failure. He doesn't trim into strength because he wants the home run. He doesn't stop out because “it'll bounce.” When it finally does bounce, he exits too early out of relief. The trade that was once an excellent opportunity ends as a scratch, a tiny gain, or a loss.
That pattern is common because most traders spend their energy on entry quality and almost none on trade handling. In DeFi, that's backwards. A decent entry with disciplined management usually outperforms a perfect entry managed emotionally.
The leak is usually one of these:
A well-managed winner can still pay you after a bad entry. A badly managed position can ruin a great entry.
Taking profit is where many traders collapse. They either dump too soon and resent the move, or hold too long and round-trip gains. If that's your recurring issue, this guide on how to take profits in crypto is worth reviewing alongside your own trade history.
They treat every trade like a position with a lifecycle. They know the initial size, the add conditions, the trim conditions, and the line where the trade is dead. That sounds simple. It isn't easy when a token is moving fast and your timeline is screaming.
But that discipline is what separates “called it” from getting paid.
You buy a breakout, size too large, and the first pullback hits before your transaction fully settles. Gas spikes. A bot sandwiches the next buyer. Liquidity thins out. Now the trade is no longer about finding the token. It is about controlling exposure while the market structure changes under you.
That is position management in DeFi. It is the process of deciding how much to buy, when to add, when to cut, and how to exit without letting one trade damage the rest of the portfolio. In traditional markets, those decisions matter. On-chain, they matter more because execution is messier, liquidity can vanish fast, and a good thesis can still lose money if the handling is poor.

Position management in DeFi rests on four parts:
A position plan separates the idea from the execution. Before I enter, I want four things written down. Initial size. Add conditions. Trim conditions. Hard invalidation.
That structure matters more in DeFi than in textbook trading examples. You are dealing with gas costs, MEV, fragmented liquidity, and wallets that can change the tape with one transaction. Good position management accounts for the path of the trade, not just the target.
Strong traders also study how profitable wallets manage size after entry. Tools like Wallet Finder.ai help track whether top wallets scale in slowly, distribute into volume, or cut quickly when momentum stalls. That is one of the clearest bridges between classic trading theory and on-chain reality. You are not guessing how pros manage risk. You can inspect the wallet behavior directly.
Big winners often come from letting a position expand after the market proves the thesis. The mistake is confusing patience with passivity. Good management keeps exposure on while strength is real, then pays out in pieces as conditions change.
On-chain losses often get worse because traders wait for one more bounce in a market that is already weakening. In DeFi, hesitation costs more than price. It can also mean worse slippage, higher gas, and fewer clean exits once everyone heads for the door.
Every position competes with the rest of your book. One oversized trade can tie up stablecoins, force bad decisions elsewhere, or leave you unable to act when a better setup appears. The goal is not to be right on every token. The goal is to stay liquid, stay disciplined, and keep capital available for the highest-quality spots.
Practical rule: If your plan only covers the buy, you do not have position management. You have an entry.
Most traders stare at total PnL and think they're measuring performance. They aren't. PnL tells you what happened. KPIs tell you why it happened.
A trader can be profitable while trading badly. Another can lose money while executing a strong process in a weak market. If you don't separate process from outcome, you'll reinforce the wrong habits.
Here's a clean scorecard to track.
| KPI | What It Measures | Why It Matters for Position Management |
|---|---|---|
| Position size as a share of portfolio | How much capital one trade consumes | Shows whether one idea can hurt the whole book |
| Maximum drawdown | Largest peak-to-trough equity decline | Reveals how much damage your risk model allows |
| Win rate | Share of trades that close green | Useful only when paired with average gain and average loss |
| Average gain vs average loss | Reward captured on winners relative to damage on losers | Exposes whether you cut winners too early or let losers run |
| Risk-adjusted return | Return quality after accounting for volatility and downside swings | Shows whether profits came from skill or reckless exposure |
| Time in trade | How long capital stays committed | Helps identify dead positions and poor capital rotation |
| Execution drift | Gap between planned and actual entry or exit | Measures how slippage, hesitation, or chasing affect results |
| Liquidity fit | Whether your position size matched market depth | Prevents large orders from becoming exit traps |
A high win rate can hide a weak strategy. If your winners are small and your losers are large, you're basically collecting tiny gains until one bad trade erases them.
A low win rate isn't automatically bad either. If your losses are controlled and your winners expand, the strategy can still work very well. Many DeFi traders misdiagnose themselves here. They think the issue is picking the wrong coins when the issue is payoff asymmetry.
The point of KPIs isn't to look professional. It's to catch patterns your ego hides.
Keep the review short and brutal:
If you want a broader metric framework for crypto trading, this breakdown of top DeFi KPIs for crypto traders is useful as a companion to your trade journal.
Most bad trades don't fail at entry. They fail because the trader has no process after entry. Good position management turns one trade into a sequence of decisions instead of one emotional blob.

Before you buy, define four things:
If you can't write that in a few lines, the trade is probably too vague. On-chain traders often confuse narrative familiarity with a real setup. Knowing the project isn't a plan.
Adding should follow strength, confirmation, or improved information. It shouldn't follow stress.
There are good reasons to add. The wallet cohort you track keeps accumulating. Liquidity improves. A key level flips and holds. Volume expands without obvious distribution. Those are evidence-based adds.
There are bad reasons too:
Stop-loss management in DeFi isn't always a hard order resting on-chain. Sometimes it's a discretionary exit line because of pool mechanics, route quality, or volatility spikes. But discretionary doesn't mean vague.
A useful sequence looks like this:
When a trade moves in your favor, your first job isn't to maximize profit. It's to remove the chance that a winner becomes a loser.
Single-price exits sound clean but often fail in fast markets. A layered exit works better because it handles uncertainty.
This does two things. It returns capital and reduces emotional pressure. Once you've realized gains, you can manage the rest more rationally.
Most traders skip the review because they want the next setup. That's how they stay stuck.
Ask:
| Review question | What you're looking for |
|---|---|
| Did the entry follow the written trigger? | Whether the trade was planned or impulsive |
| Did adds improve the position? | Whether scaling helped or just increased stress |
| Did exits match the plan? | Whether greed or fear changed the process |
| Did on-chain conditions alter the result? | Whether slippage, gas, or MEV should change future sizing |
| Would you take the same trade again? | Whether the process is repeatable |
A trade journal doesn't need to be fancy. A simple log with screenshots, notes, and timestamps is enough if you review it with objectivity.
Once the basic lifecycle is stable, you can adopt more advanced methods. The key is choosing the right tactic for the right market state. Many traders use complex strategies as if they're personality traits. They aren't. They're tools.
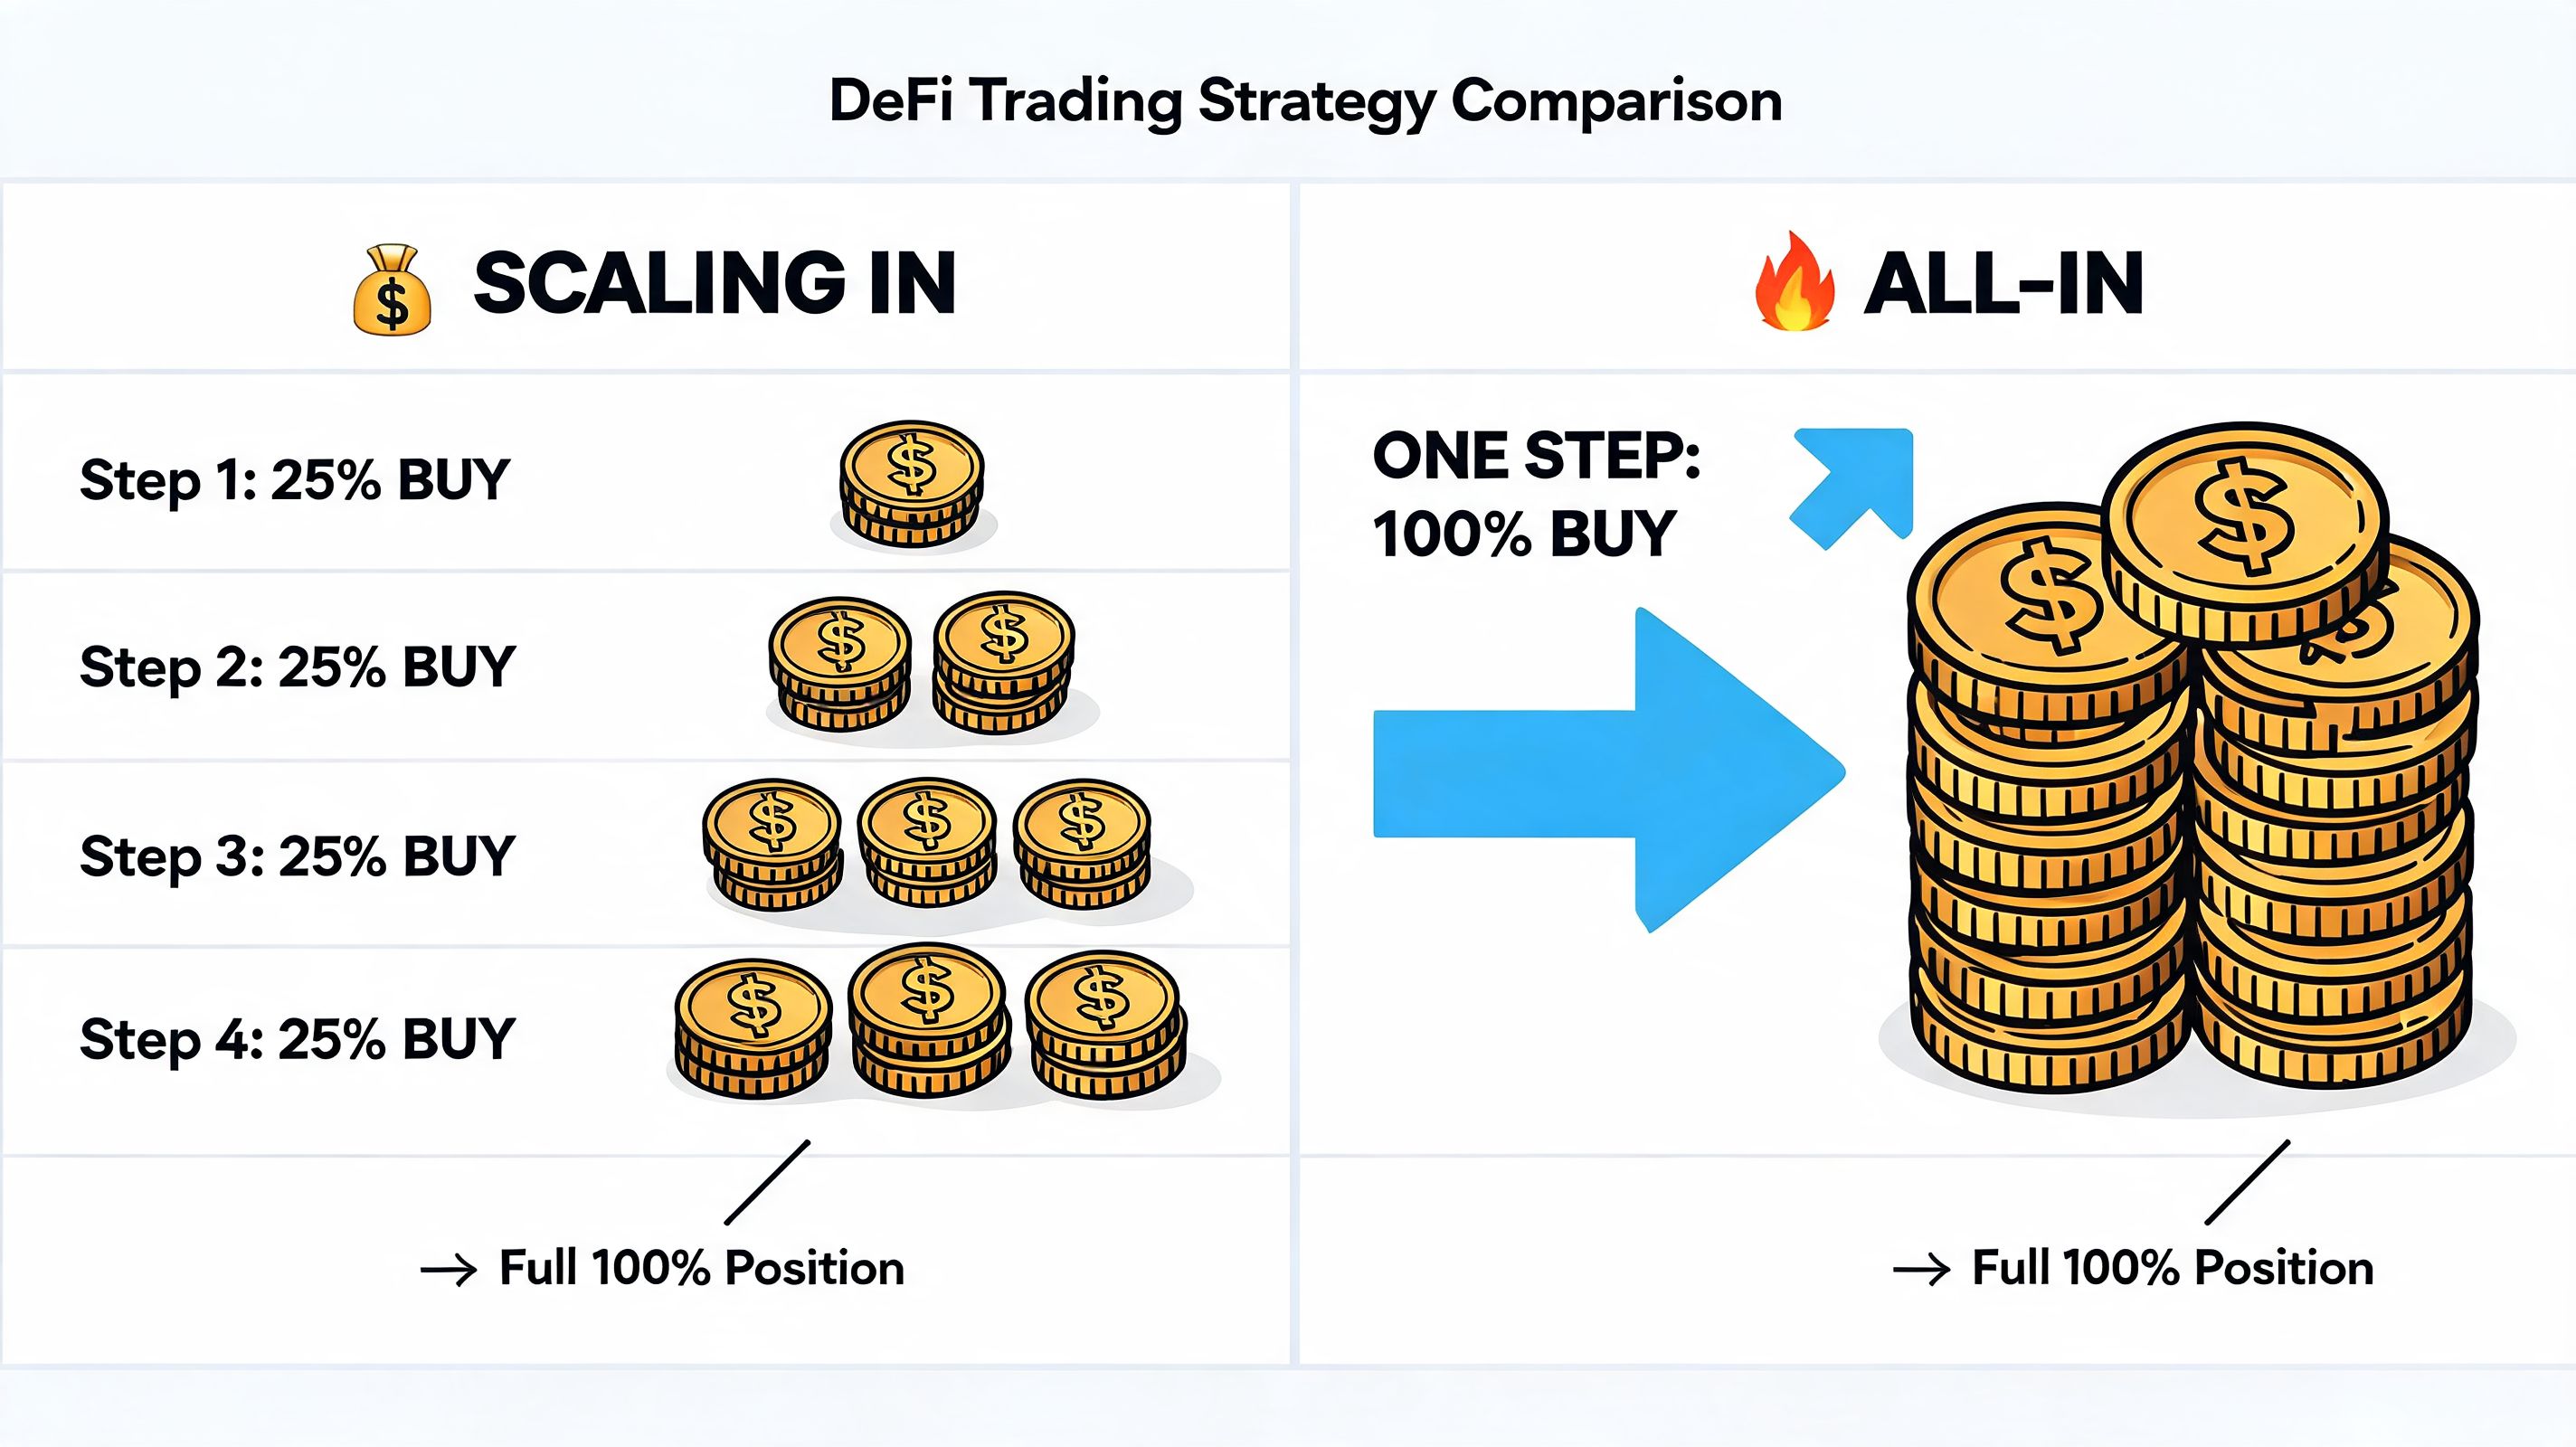
All-in deployment has one advantage. It's simple. If your timing is excellent and liquidity is deep, it can work.
But on-chain, all-in often creates avoidable problems. You expose too much capital before confirmation, worsen average execution, and lose flexibility if the setup changes.
| Approach | When it fits | Main trade-off |
|---|---|---|
| Scaling in | Volatile tokens, uncertain breakout quality, thin liquidity | You may underexpose the initial move |
| All-in entry | Very high conviction setup with tight invalidation and strong liquidity | A bad first fill can define the whole trade |
Scaling in is usually stronger for DeFi because market structure can change quickly. It lets you test the trade with smaller risk, then press only if the market agrees.
A lot of traders think trimming means low conviction. Usually it means professionalism.
Scaling out lets you monetize strength without needing to predict the exact top. This is especially useful in tokens where momentum traders and copy flows create sharp intraday spikes followed by violent retracements.
If your strategy needs perfect tops to work, your strategy is fragile.
Pyramiding is different from casual scaling. You're adding to a winner as it moves in your favor, usually from unrealized gains or after major confirmation.
It's powerful because it concentrates capital into what is already working. It's dangerous because traders often pyramid too aggressively and turn a strong position into a bloated one right before reversal.
Sometimes the right move isn't to sell the whole spot position. It's to reduce directional exposure.
In practice, traders hedge by rotating some exposure into stablecoins, offsetting with a short elsewhere, or reducing correlated positions. The point isn't sophistication for its own sake. The point is keeping a good core position alive when short-term conditions get noisy.
A hedge is useful when your long-term thesis still holds but near-term risk rises. It's less useful when the original thesis is plainly broken. In that case, exiting is cleaner than pretending a hedge fixes a bad read.
A strategy that looks solid on a chart can fail badly on-chain. Not because the thesis was wrong, but because execution friction changed the economics of the trade.
That's the part many traders still underestimate. They manage the idea well and the transaction poorly.
In low-liquidity pools, your planned size may be reasonable in dollar terms but terrible in market terms. A market buy can move your entry far enough that your risk-reward is damaged before the position even starts.
The same goes for exits. A stop level on paper means little if the pool can't absorb your size cleanly. This is why liquidity fit belongs inside position management, not as an afterthought.
Practical checks before size goes on:
MEV isn't abstract if you trade size on public rails. If your order is visible and predictable, other actors can exploit it. Sandwich attacks are the clean example. You try to buy. Another actor moves around your trade. Your fill gets worse. Their edge comes directly out of your pocket.
You don't always avoid this completely, but you can reduce exposure by being selective about execution methods, avoiding obvious panic orders, and respecting liquidity conditions. If your position management assumes screen price equals executable price, your model is too optimistic.
A trade isn't profitable because the chart says so. It's profitable when the chain lets you enter and exit near the prices your plan requires.
On some chains, active management is cheap enough to support frequent adjustment. On others, every trim, hedge, or stop execution has to justify itself economically.
That matters because over-management can become its own leak. Traders sometimes make too many small changes and donate edge through transaction costs. On Ethereum mainnet especially, position management has to account for whether the adjustment is worth the fee and execution risk.
A chart trader might say, “I'll just stop here and re-enter there.” On-chain, that assumes instant fills, low friction, no front-running, and adequate depth. Real execution rarely gives you all four.
Build your trade plan around the venue you're using:
| Challenge | Why it matters | Better response |
|---|---|---|
| Low liquidity | Entry and exit prices drift from plan | Reduce size or split orders |
| MEV exposure | Public orders can be exploited | Use more careful execution and avoid emotional urgency |
| High gas | Frequent management becomes expensive | Make fewer, higher-quality adjustments |
| Fragmented routing | Aggregators may use poor paths | Check route quality before sending size |
If you ignore these mechanics, “good risk management” becomes theory.
Most traders study top wallets only for entries. That leaves a lot of edge on the table. The bigger edge is often in how those wallets manage positions after entry.
![]()
When you analyze a profitable wallet, don't stop at “they bought early.” Track the full lifecycle:
That workflow helps you separate luck from repeatable behavior.
A solid process usually combines:
| Tool type | Use in position management |
|---|---|
| Wallet trackers | Study entry timing, adds, exits, and consistency across trades |
| DEX aggregators | Check route quality, slippage, and available liquidity before execution |
| Charting tools | Mark invalidation, trend structure, and trim zones |
| Trade journal | Record what you planned versus what you actually did |
| Alerting tools | Catch wallet activity or price levels without staring at screens all day |
For wallet analysis, Wallet Finder.ai surfaces profitable wallets, complete trade histories, PnL, entry and exit timing, and position sizing across ecosystems including Ethereum, Solana, and Base. Used properly, that lets you study whether high-performing wallets build positions gradually, trim in stages, or abandon trades quickly when conditions change.
The point isn't blind imitation. It's learning how skilled participants handle uncertainty, liquidity, and timing under real on-chain conditions.
If you want a faster way to study how profitable wallets size in, scale, trim, and rotate, Wallet Finder.ai gives you the raw on-chain behavior to analyze those decisions directly. Use it to build watchlists, inspect complete trade histories, and turn wallet activity into a position management playbook you can test.

A premier DeFi analytics platform empowering traders to discover and analyze profitable blockchain wallets, trades and tokens.

