
Recovery Factor Calculation for Smart Traders
Master the recovery factor calculation to measure a strategy's resilience. Learn the formula, see DeFi examples, and find top wallets with Wallet Finder.ai.

June 20, 2026


Wallet Finder
February 15, 2026

Cashing out on Coinbase is simple: you sell your crypto for a fiat currency (like USD or EUR) and then transfer that cash to your bank, PayPal, or a debit card. This process is the final step for locking in your crypto profits. It’s designed to be a direct line from digital asset to spendable cash in just a handful of clicks.
Most guides tell you how to cash out on Coinbase. Almost none tell you when you should. This timing decision can cost you thousands in unnecessary fees, slippage, and taxes—or save you the same amount with a few strategic moves.
The moment you click "sell" isn't just a technical transaction. It's a financial decision with immediate consequences that ripple through your taxes, your available capital, and even your future trading opportunities.
Here's a scenario that happens daily: Bitcoin pumps 5% in an hour. You get excited, decide to lock in profits, and hit sell. Coinbase executes your order at $98,500. But by the time you check your fiat balance, you got filled at $97,200. You just lost $1,300 on a $100K position due to slippage and the spread during volatile conditions.
This isn't Coinbase ripping you off—it's basic market mechanics. During high volatility, the spread between buy and sell prices widens dramatically. The order book gets thin. Your market sell order eats through available buy orders at progressively worse prices.
The fix is simple but requires discipline: never market sell during volatility spikes. If you're selling a significant position (over $10K), use limit orders and be willing to wait 30-60 minutes for the market to settle. You'll get filled at your target price instead of whatever chaos price the market offers.
Friday afternoon feels like the perfect time to cash out your week's gains. You sell your crypto, initiate an ACH withdrawal to your bank, and expect the money Monday or Tuesday. Except it doesn't arrive until Thursday because you forgot one crucial detail: banks don't process ACH transfers on weekends.
Your sell executed Friday at 4pm. The cash sat in your Coinbase account all weekend doing nothing. The ACH transfer initiated Monday morning. Banks take 1-3 business days, which means your funds arrive Wednesday at the earliest, Thursday more likely.
Meanwhile, if you'd waited until Monday morning to sell, you'd have gotten the same result but with two extra days to change your mind or respond to market conditions. Or if you truly needed the cash Friday, you should've used instant card withdrawal (yes, it costs more in fees, but you'd have had the money in 30 minutes).
The lesson: plan your withdrawal method around your actual cash needs, not just convenience. If you don't need the money urgently, ACH on Monday beats ACH on Friday. If you do need it urgently, instant withdrawal is worth the premium.
December is the most important month for strategic withdrawals, and most traders completely waste it. Here's why: capital losses offset capital gains dollar-for-dollar on your taxes. If you're sitting on positions that are underwater, selling them before December 31st can save you thousands in taxes.
Real example: You made $50,000 profit on Bitcoin this year but you're sitting on an Ethereum position that's down $15,000 from your purchase price. If you do nothing, you owe capital gains tax on the full $50,000 (roughly $7,500-$18,500 depending on your bracket and whether it's short or long-term).
But if you sell that losing ETH position before December 31st, you can claim the $15,000 loss. Now you only owe taxes on $35,000 in net gains (saving you $2,250-$5,500 in taxes). You can immediately rebuy that Ethereum if you want to maintain the position—just make sure you wait 30 days to avoid the wash sale rule.
This is called tax-loss harvesting, and Coinbase makes it dead simple. Go to your tax center, download your gain/loss report, identify your biggest losers, and sell them before year-end. The cash goes to your fiat wallet and you can withdraw it or rebuy different crypto. Either way, you've reduced your tax bill legally.
Turning crypto gains into actual cash is the end goal for many investors. Coinbase offers several ways to move your money from the platform to your personal accounts. Think of it as the reverse of buying crypto—instead of pushing money in, you're pulling it out.
Consider this your map for the journey ahead. We'll lay out the core concepts of selling your assets and starting a withdrawal, setting the stage for the detailed step-by-step instructions later on.
The entire process can be broken down into two main phases: selling your crypto and then withdrawing the cash.
Coinbase has grown significantly in this department, mirroring the crypto market's expansion. The platform went from offering basic bank transfers to sophisticated integrations that handle enormous quarterly volumes. It supports a wide range of fiat currencies, and a huge chunk of its business comes from everyday consumers—many of whom are cashing out. You can dive deeper into Coinbase's user statistics and growth on backlinko.com.
Cashing out isn't just a transaction; it's a strategic decision. Understanding the timing, fees, and available methods ensures you keep more of your hard-earned profits.
Before you can pull any funds out, however, your account needs to be set up and verified correctly. That’s a crucial step we'll get into next.
Before you even think about cashing out on Coinbase, you need to lay some groundwork. Many users hit frustrating withdrawal delays simply because they skipped these setup steps. Taking care of this now ensures your funds are secure and ready to go when you need them.
The first and most important hurdle is completing the Know Your Customer (KYC) process. This is a mandatory identity check required by financial regulations to prevent fraud.
Here's what you'll need to provide:
Once you’re verified, you unlock your account's full potential, including the ability to withdraw funds.
If you're outside the US, cashing out on Coinbase can be significantly more complicated. Most guides ignore this entirely, assuming everyone banks in USD with an American institution. That's not reality for millions of Coinbase users.
Let's say you're in the UK. You sell 1 Bitcoin for $98,000. Coinbase gives you £76,500 in your GBP wallet (using their exchange rate). You initiate a withdrawal to your UK bank account. The money arrives. Everything looks fine.
Except Coinbase just charged you a hidden currency conversion fee buried in their exchange rate. The actual GBP/USD rate at that moment was 1.2820, which should have given you £76,465. But Coinbase's rate was 1.2805, giving you £76,230. You lost £235 ($300) to the spread on that single conversion.
On large withdrawals, this adds up fast. A $500K withdrawal could easily cost you $1,500-$3,000 in hidden conversion fees.
The solution: Don't convert at Coinbase's rate if you can avoid it. Instead, sell your crypto for USDC (a stablecoin pegged to the US dollar). Transfer that USDC to a dedicated forex service like Wise or Revolut that offers true mid-market exchange rates with transparent fees. Convert USDC to your local currency there, then withdraw to your bank. You'll save hundreds or thousands depending on the amount.
If you're in Europe, you have two withdrawal options: SEPA and SWIFT. Most people default to SEPA because it's free and familiar. But SEPA has strict limits (often €15,000-€50,000 per transaction) and can take 1-3 business days.
For large withdrawals over €50,000, you're forced into SWIFT wire transfers. These cost €25-€50 in fees and your receiving bank might charge another €15-€30. On a €100,000 withdrawal, you could easily pay €75 total in fees. But the transfer completes within one business day, and there's no upper limit.
Here's the optimization: batch your large withdrawals. Instead of doing five separate €40,000 SEPA transfers over five days (free but slow), do one €200,000 SWIFT transfer (€50 fee, arrives tomorrow). You save time and, in many cases, reduce exposure to exchange rate fluctuations during the multi-day SEPA process.
This is brutal and happens constantly: you successfully sell your crypto on Coinbase. You initiate a withdrawal to your bank account. Coinbase confirms the transfer was sent. The money never arrives.
You call your bank. They tell you they blocked the incoming transfer because it came from a "high-risk cryptocurrency exchange." Your funds are now in limbo. Coinbase says they sent it. Your bank says they rejected it. Nobody has your money.
The fix requires planning ahead. Before you sell a single dollar of crypto, call your bank's fraud department and inform them you'll be receiving transfers from Coinbase. Get confirmation that they won't block these deposits. If they refuse to confirm, you need a crypto-friendly bank immediately.
Crypto-friendly banks in the US include: Ally Bank, Chime, Cash App, and some credit unions. In Europe: Revolut, N26, and Bunq. In the UK: Starling Bank and Monzo. These institutions understand crypto and won't randomly freeze your deposits.
If you're already stuck with a rejected transfer, contact Coinbase support immediately with your bank's rejection notice. They'll reverse the transfer and send the funds back to your Coinbase fiat wallet, where you can then send to a different bank. This process takes 5-10 business days, during which your money is completely inaccessible.
With your identity confirmed, the next move is telling Coinbase where to send your cash. You can securely link your bank account using Plaid, which lets you sign in with your online banking credentials. Alternatively, you can link a debit card for instant transfers or connect your PayPal account.
Critical Note: The name on your linked payment method must exactly match the name on your Coinbase account. Any difference can trigger a security flag and delay the transaction.
Pro Tip: Link your main bank account long before you plan to sell. This gives the system plenty of time to verify the connection and saves you from hitting any last-minute snags when you're trying to lock in profits.
Every Coinbase account comes with withdrawal limits, which cap how much cash you can pull out in a given timeframe (usually 24 hours). These limits are in place for security and vary based on your account's age, trading volume, and verification level.
To check your specific limits:
If your limits are too low for a large sale you're planning, you can request an increase directly from that screen. Coinbase will review your account history and may approve a higher limit. Building a consistent track record of legitimate activity is the best way to earn higher limits over time.
For those juggling assets across different platforms, it’s also useful to learn how to link Coinbase to your Coinbase Wallet to keep your entire crypto ecosystem streamlined. Nailing these details upfront is the key to a completely frustration-free experience.
Once your account is set up and verified, you're ready to turn your crypto into cash. The process on Coinbase is designed to be straightforward, whether you're using a computer or the mobile app.
The core of it is a two-part play: first, you sell your cryptocurrency for a fiat currency (like USD, EUR, or GBP), and second, you withdraw that cash to your linked account. Let's break down exactly how it works.
Working from a desktop gives you a bit more screen real estate, which can make navigating your portfolio feel clearer.
The sale typically executes instantly, and the cash will appear in your fiat balance (your USD Wallet, for example), ready for withdrawal.
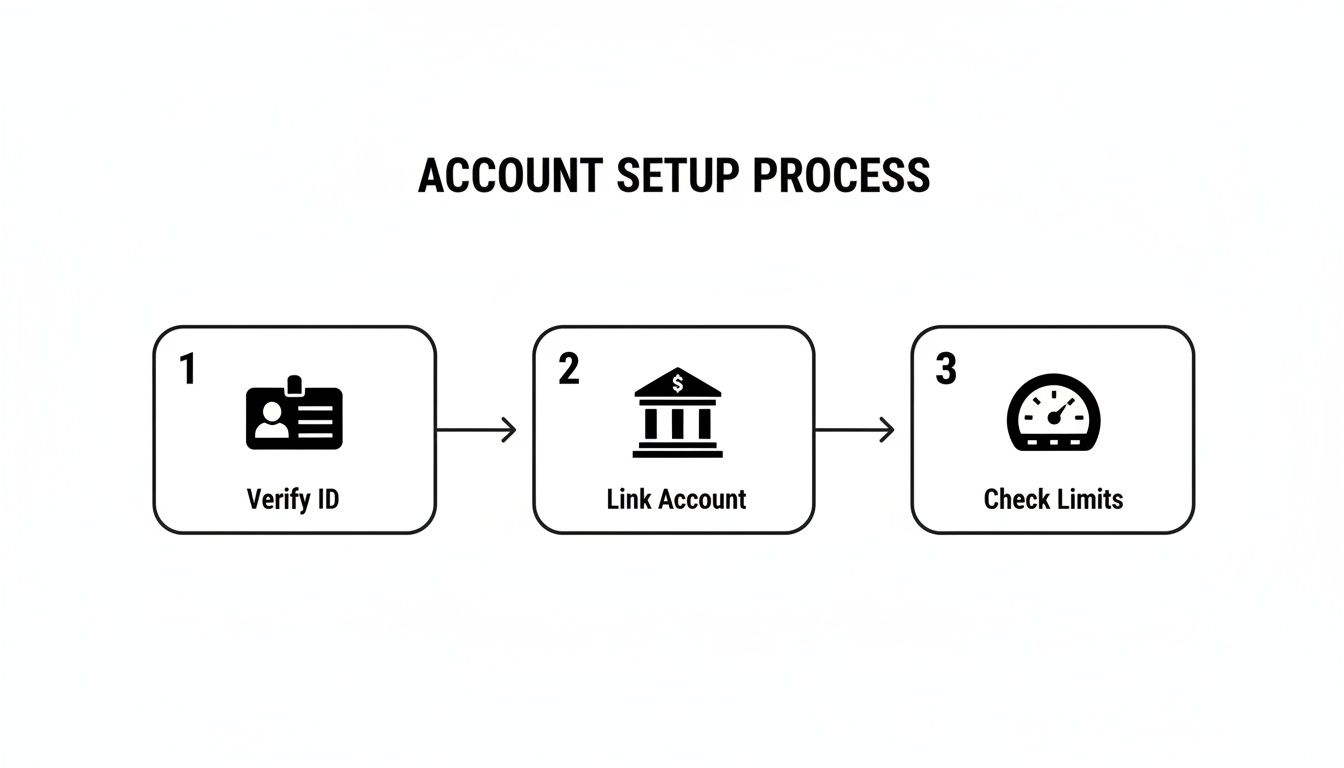
Nailing these foundational steps—ID verification, linking an account, and checking your limits—is what keeps the whole process smooth and prevents annoying delays when you're ready to cash out.
The mobile app has a more compact feel, but the steps are essentially identical and built for speed.
This efficiency is a big part of why millions use the platform. In 2021 alone, Coinbase brought in a staggering $6.84 billion in transaction revenue, accounting for almost 86% of its total income that year. This underscores how central simple buy/sell actions are to their business.
Key Takeaway: After you sell your crypto, the cash is just sitting in your Coinbase account. It's not in your bank yet. You have to complete the final withdrawal step to actually move the money out of the exchange.
Alright, you've sold your crypto and the cash is in your fiat wallet. Time to bring it home.
And that's it. The money is on its way.
Of course, if your goal is to move assets to a self-custody solution instead of cashing out, that's a different path. For that, you'll want to check out our guide on how to move crypto from Coinbase to a wallet.
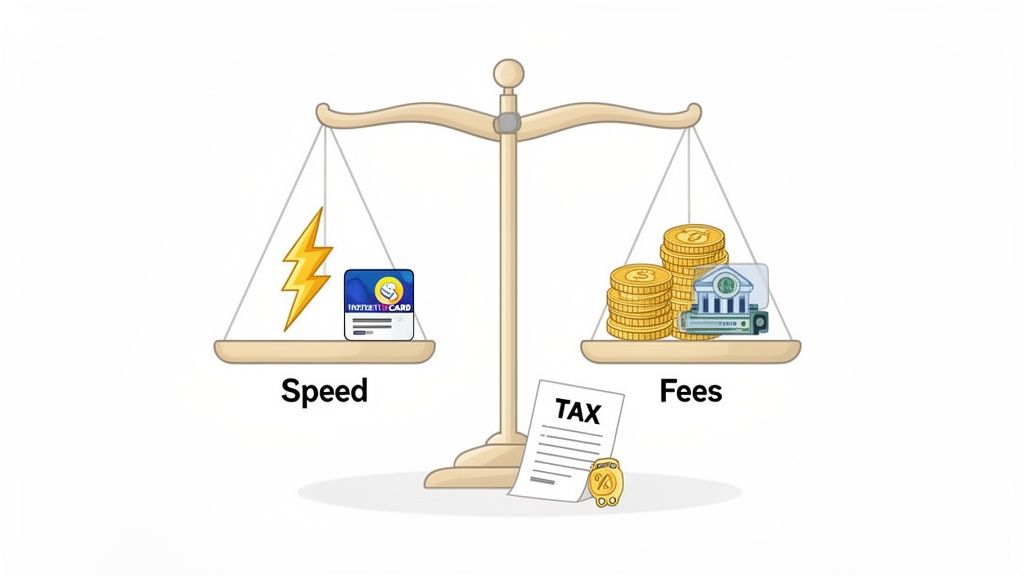
Successfully cashing out your crypto isn't just about clicking a button. To keep as much of your profit as possible, you need to be smart about how you withdraw. It's a classic trade-off: do you want your money fast, or do you want to pay less in fees?
Getting this balance right separates a smooth exit from a frustrating one. Every withdrawal method on Coinbase has its own cost and timeline, so your choice really depends on your situation.
The big decision you'll face every time you cash out is speed versus cost. The fastest withdrawal options will almost always have higher fees, while the cheapest methods require patience.
Here’s a quick rundown of how the most common methods stack up:
This table breaks down the most common options to help you decide which one fits your needs.
When you're ready to move cash from Coinbase to your bank, you have four main options. Each one balances speed against cost differently, so picking the right method depends on your situation.
Fee Structure: Usually Free
Processing Time: 1-3 Business Days
Best For: Cost-conscious users who aren't in a rush. This is the default choice if you want to keep every dollar of your profits and don't mind waiting a few days for the money to arrive.
Fee Structure: Flat Fee (typically around $25)
Processing Time: Within 1 Business Day
Best For: Large, urgent withdrawals. When you're moving significant amounts and need the money tomorrow, the flat fee is worth paying for the speed and reliability.
Fee Structure: Percentage-based Fee
Processing Time: Nearly Instant
Best For: Quick access and convenience. You'll pay more than ACH but less than instant card, and the money arrives in your PayPal account within minutes, giving you immediate flexibility.
Fee Structure: Percentage-based Fee (highest of all methods)
Processing Time: Within 30 Minutes
Best For: Immediate, emergency fund needs. This is your panic button—when you absolutely must have cash in your account right now, you pay a premium but get instant access.
As you can see, there’s a clear path for every scenario. Planning ahead and using the free ACH transfer is the default money-saver, but it's good to know faster options exist when you need them.
Let's talk about the part everyone wants to ignore: taxes. Selling your crypto for a profit is a taxable event. That profit is treated as a capital gain, and you will likely owe taxes on it. Ignoring this can lead to major issues with the IRS or your local tax authority.
Your job isn't done when the cash hits your bank account. Keeping meticulous records of every single sale is non-negotiable for staying compliant and reporting your taxes accurately.
Coinbase helps by providing access to your full transaction history and tax reports in their tax center. These documents are critical for calculating your gains and losses. However, it's highly recommended to consult a tax professional who understands cryptocurrency to ensure you're reporting everything correctly.
Once you're moving five or six figures off Coinbase, you're playing a completely different game. The stakes are higher, the risks are different, and one mistake can cost you everything.
Your Coinbase USD wallet is FDIC insured up to $250,000. This means if Coinbase goes bankrupt (unlikely but not impossible), you get your cash back up to that limit. Anything over $250,000? Gone.
Most traders don't think about this until they sell a massive position and suddenly have $800,000 sitting in their Coinbase USD wallet for 2-3 business days waiting for an ACH transfer to clear. During those 72 hours, you have $550,000 exposed to Coinbase's corporate risk with zero insurance protection.
The solution: split large sales across multiple transactions and withdraw immediately. If you're selling $800,000 worth of Bitcoin, sell $200,000, initiate instant withdrawal to your bank, wait for confirmation, then sell another $200,000. Repeat until complete. This keeps your Coinbase balance under the insurance limit at all times.
Yes, instant withdrawals have higher fees (1.5% on card withdrawals). On $800,000, that's $12,000 in fees. But it's also insurance against Coinbase collapse during your transfer period. For most wealthy traders, that's a worthwhile premium.
You've enabled 2FA on your Coinbase account. Great. You're still not safe from SIM swap attacks.
Here's how it works: A scammer calls your mobile carrier pretending to be you. They claim they lost their phone and need their number ported to a new SIM card. If the carrier's employee isn't careful (and they often aren't), they authorize the port. Now the scammer has your phone number and receives all your SMS 2FA codes.
They log into your Coinbase account using your password (stolen via phishing or data breach). Coinbase sends a 2FA code via SMS. It goes to the scammer's phone. They enter it, gain access, sell all your crypto, and withdraw to their own bank account. By the time you realize your phone stopped working, your entire portfolio is gone.
The fix: Never use SMS for 2FA on Coinbase. Use an authenticator app (Google Authenticator, Authy) or better yet, use a hardware security key like Yubikey. These can't be SIM-swapped because they're physical devices. Even if someone steals your password, they can't access your account without physically stealing your Yubikey.
Coinbase supports hardware keys. Set this up before you have six figures in crypto. Once you're wealthy, you become a target.
Coinbase offers a withdrawal address whitelist feature that almost nobody uses. Once enabled, you can only withdraw cash to pre-approved bank accounts or payment methods. Adding a new withdrawal destination requires a 48-hour waiting period.
This is catastrophic if someone hacks your account. Even if they get past 2FA (via SIM swap or malware), they can't add their own bank account and withdraw your funds. The 48-hour delay gives you time to notice the suspicious activity and freeze your account.
Enable this immediately: Settings → Security → Address Book → Require Whitelist. Then add all your legitimate withdrawal destinations. Accept the inconvenience of 48-hour delays when you need to add new accounts. This one feature can save your entire portfolio from theft.
For serious traders, cashing out on Coinbase is a calculated move. It's about locking in profits, avoiding unnecessary fees, and timing your exit with precision. This means looking past the basic "sell" button and using the platform's more powerful tools.
A smart strategy often starts with neutralizing market risk. Instead of immediately selling your crypto for fiat (which can be slow and creates a taxable event), consider swapping it to a stablecoin like USDC first. This move effectively parks your gains, shielding them from a sudden market dump while you plan your next step.
Key Insight: Flipping a volatile asset like ETH into a stablecoin like USDC lets you step away from the market's wild price swings instantly, without having to move funds off-chain right away. This buys you valuable time to plan your cash-out strategy or redeploy that capital without feeling pressured.
This approach leaves you with a stable asset to work with, setting you up for a much more deliberate and cost-effective exit.
Think of USDC as a temporary safe harbor for your profits. Once you've swapped your crypto for USDC, your capital is protected from volatility. From there, you can move the USDC to your fiat wallet on Coinbase whenever you're ready to pull the trigger on the final withdrawal to your bank account.
This two-step process gives you key advantages:
When you're ready to turn your crypto or stablecoin into cash, use the right tool to slash your costs. Instead of the simple "Sell" button, active traders should use Coinbase Advanced. This platform has a tiered fee structure based on your 30-day trading volume.
The difference in cost is massive. A simple conversion often has a high spread or flat fee, but Coinbase Advanced uses a maker-taker model with significantly lower fees, especially for larger amounts. If you're cashing out a four or five-figure position, the savings can easily run into the hundreds of dollars.
It's this kind of robust ecosystem that has propelled Coinbase's net income from a $2.625 billion loss in 2022 to a $2.578 billion profit in 2024. With 73 million verified users, these optimized cash-out methods are essential. You can learn more about Coinbase's massive user base and financial stats.
Even when you follow every step perfectly, trying to cash out on Coinbase can sometimes hit a bump. Seeing a delayed or failed withdrawal is frustrating, but most issues have a straightforward explanation and a clear solution.
Knowing what to look for can save you a ton of stress and get your funds moving again.
Once you've confirmed a withdrawal from Coinbase to your bank account, it's almost impossible to reverse. The transaction gets queued immediately and begins processing within minutes. By the time you realize you entered the wrong amount or chose the wrong account, it's too late.
Coinbase is very clear about this: they cannot cancel or reverse withdrawals after confirmation. You'd need to contact your receiving bank and ask them to reject the incoming deposit, but most banks won't do this unless there's clear fraud.
The prevention is simple: triple-check every withdrawal before clicking confirm. Verify the amount, verify the destination account, verify the withdrawal method. Take your time. The 30 seconds you spend confirming details can save you from irreversible mistakes.
If you do send funds to the wrong account, your only recourse is contacting the owner of that account and asking them to send the money back. Good luck with that if it's a stranger.
When you buy crypto on Coinbase using a bank transfer (ACH), there's typically a 7-14 day hold before you can withdraw that crypto off the platform. This confuses people because the crypto shows in their balance immediately, so they assume they can move it.
The hold exists because ACH transfers are reversible for several days after initiation. Coinbase credits your account immediately so you can start trading, but they don't actually have your money yet. If they let you withdraw the crypto before the ACH cleared, you could buy crypto, withdraw it, then reverse the ACH payment. That's fraud.
The wait time depends on your payment method. Debit cards and wire transfers have shorter or no holds because those payments clear faster. ACH has the longest hold because it's the slowest, most reversible payment method.
Two ways to avoid this: Use a debit card for smaller purchases (no hold, but higher fees), or plan ahead. If you know you'll want to withdraw in a week, buy the crypto today via ACH and wait out the hold period.
Bank rejections happen more often than you'd think, and they're a nightmare to resolve. Your bank might reject a Coinbase deposit because they flag it as suspicious activity, they have policies against cryptocurrency transactions, or their automated fraud detection triggers incorrectly.
When this happens, Coinbase shows the withdrawal as "completed" on their end because they successfully sent the funds. But your bank never accepted them. The money is in limbo.
The resolution process: Contact your bank first and get a clear explanation for why they rejected the deposit. Get this in writing (email or letter). Then contact Coinbase support and provide proof of the rejection. Coinbase will investigate, which takes 5-10 business days. Eventually, they'll reverse the transfer and return the funds to your Coinbase fiat wallet.
During this entire period (often 2+ weeks), you have no access to your money. It's not in your bank. It's not in Coinbase. It's just gone, stuck in banking purgatory.
Prevention is everything: Before you ever sell crypto on Coinbase, verify your bank accepts deposits from cryptocurrency exchanges. Call them. Ask explicitly. If they say no or seem uncertain, open an account at a crypto-friendly bank immediately.
This is complex and you should absolutely consult a tax professional, but here are the core strategies:
First, understand the difference between short-term and long-term capital gains. If you sell crypto you've held for less than one year, profits are taxed as ordinary income (up to 37% federal in the US). If you've held it over one year, you pay long-term capital gains rates (0%, 15%, or 20% depending on income).
The optimization: If you're sitting on big unrealized gains and you're close to the one-year mark, wait. Selling at 11 months means 37% tax. Selling at 13 months means 15-20% tax. On a $100,000 gain, that's the difference between paying $37,000 and paying $15,000-$20,000. Waiting one month saves you $17,000-$22,000.
Second, use tax-loss harvesting aggressively. Sell losing positions to offset your gains. If you made $100,000 on Bitcoin but lost $30,000 on Ethereum, selling both means you only owe taxes on $70,000 in net gains.
Third, consider donating appreciated crypto to charity instead of selling it. If you donate crypto you've held over one year, you get a tax deduction for the full market value and you never pay capital gains tax on the appreciation. This only makes sense if you were planning to donate anyway, but it's significantly more tax-efficient than selling and donating cash.
Fourth, spread large sales across multiple tax years if possible. Selling $500,000 in one year might push you into a higher tax bracket. Selling $250,000 this December and $250,000 next January keeps you in a lower bracket and saves thousands.
Yes, but the limit varies dramatically based on your account age, verification level, and transaction history. New accounts might have limits as low as $1,000-$5,000 per day. Established, fully verified accounts can have limits of $50,000-$250,000 per day or even higher.
Check your specific limit: Settings → Account Limits. You'll see different limits for different withdrawal methods. ACH might have a $50,000 daily limit while wire transfer has a $100,000 limit.
If you need to withdraw more than your limit allows, you have two options. First, request a limit increase directly through that settings page. Coinbase will review your account history and may approve higher limits, though this isn't guaranteed and can take several days.
Second, split your withdrawal across multiple days. If you have a $50,000 daily limit and need to withdraw $200,000, do $50,000 today, $50,000 tomorrow, $50,000 the next day, etc. This works fine if you're not in a rush and your bank doesn't have issues with multiple large deposits.
For extremely large withdrawals ($1M+), contact Coinbase's dedicated support for high-value accounts. They can facilitate larger single transactions, though they'll likely require additional verification and have longer processing times.
No. Coinbase's security and compliance policies strictly prohibit withdrawing to bank accounts that don't match your verified identity. The name on your Coinbase account must exactly match the name on any linked bank account or payment method.
This prevents money laundering and fraud. If Coinbase allowed you to send cash to anyone's bank account, criminals would exploit it instantly.
If you need to send money to someone else, you have to: withdraw to your own bank account first, then use your bank's transfer service to send to the other person. Or use a peer-to-peer payment service like Venmo or PayPal after the money is in your bank.
The only exception is if the other person is a joint account holder on your bank account. Some banks allow this, some don't. You'd need to verify with Coinbase support, and they'd likely require documentation proving the joint account ownership.
If you’re still stuck after trying these steps, it’s time to gather your transaction details and contact Coinbase Support for help.
At Wallet Finder.ai, we turn complex on-chain data into clear, actionable signals. Discover profitable wallets and mirror the moves of top traders in real time. Start your 7-day trial and trade smarter at https://www.walletfinder.ai.

A premier DeFi analytics platform empowering traders to discover and analyze profitable blockchain wallets, trades and tokens.

