
Recovery Factor Calculation for Smart Traders
Master the recovery factor calculation to measure a strategy's resilience. Learn the formula, see DeFi examples, and find top wallets with Wallet Finder.ai.

June 20, 2026


Wallet Finder
January 10, 2026
Moving your crypto from Coinbase to a personal wallet is a straightforward process that gives you full control. It boils down to three key actions: getting your wallet's "receive" address, using the "send" feature in Coinbase, and carefully confirming the details before sending. This simple transfer unlocks better security and opens the door to the wider world of decentralized finance (DeFi).
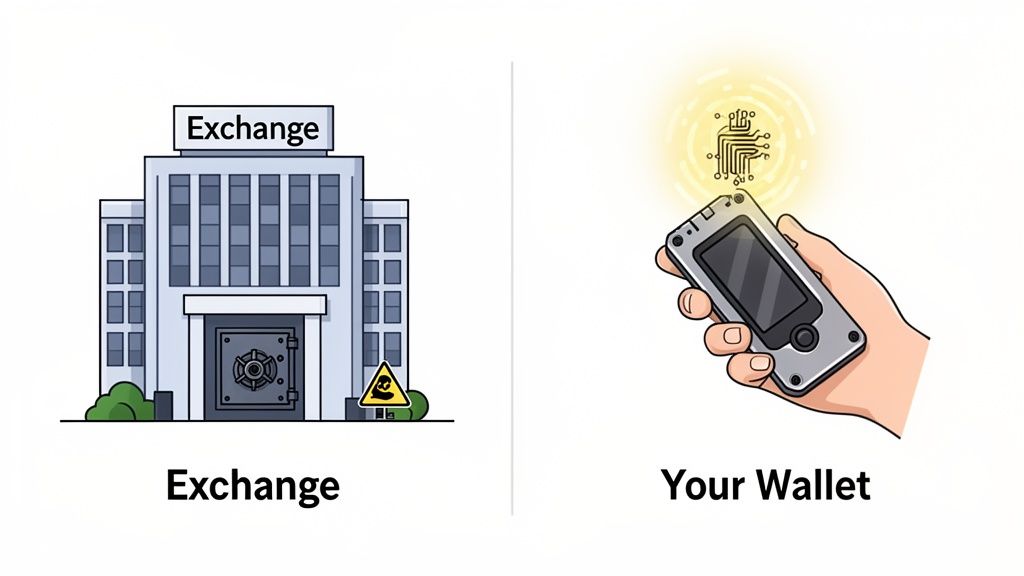
Keeping crypto on an exchange like Coinbase is convenient, but you don't truly own your assets. The exchange holds the private keys, giving them ultimate control. Learning how to move crypto from Coinbase to your own wallet is a crucial step toward self-custody and gaining a strategic edge.
The old crypto saying, "not your keys, not your coins," is a core security principle.
When you take your assets into your own hands—a practice known as self-custody—you unlock significant advantages:
Every transfer you make from an exchange to your personal wallet is recorded forever on the blockchain. This on-chain history is invaluable for tracking your performance and makes your strategies visible to platforms built to analyze skilled wallets. Understanding the difference between holding assets on an exchange versus in a wallet is critical, as our guide on crypto exchanges vs. wallets explains.
The move to self-custody changes your role from a passive investor to an active participant in the decentralized economy. Think of it as the difference between keeping your money in a bank versus holding cash in your own secure safe.
The flow of funds between exchanges and personal wallets is a massive signal for market analysts. For instance, in one tracked event, a staggering 2,063 BTC (worth around $183.8 million at the time) was moved into a Coinbase institutional address. Analysts saw this as a sign of big players getting into position.
For DeFi copy traders and quant funds, moving crypto off Coinbase is about building a trading footprint that intelligence platforms can track. This permanent record solidifies your on-chain reputation with every transaction.
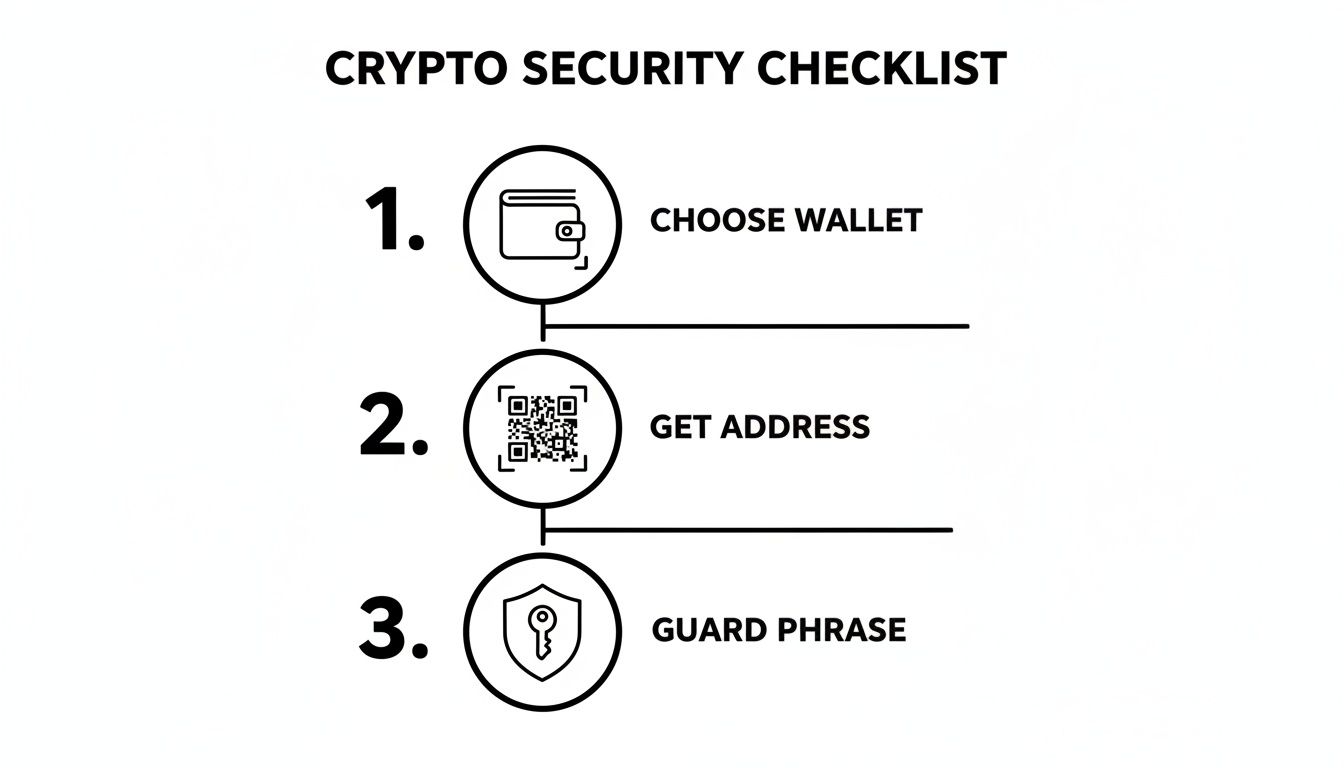
Before you hit “Send” on Coinbase, a few minutes of careful preparation can prevent costly mistakes. Treat this as your non-negotiable pre-flight check.
First, choose and set up your non-custodial wallet. This could be a browser-based wallet like MetaMask for Ethereum, Phantom for Solana, or a hardware wallet from Ledger or Trezor for maximum security.
During setup, you will receive a seed phrase (or recovery phrase)—a list of 12 or 24 words that acts as the master key to your crypto.
Your seed phrase is the single most important piece of information you will manage in crypto. If you lose it, your funds are gone forever. If someone else gets it, they have full control of your assets.
How you handle this phrase determines the security of your entire crypto portfolio.
This table outlines the hard rules for protecting your assets.
Treat your seed phrase like a bearer bond for all your crypto—because that's what it is.
Once your wallet is set up and your seed phrase is secure, find your "receive" or "deposit" address. This is the unique string of characters for a specific blockchain. You will copy this and paste it into Coinbase as the destination.
If you need help, our detailed guide explains how to find your crypto wallet address.
A common issue is when a successful transfer doesn't appear in your wallet. This often happens with less common ERC-20 tokens because your wallet doesn't automatically recognize every asset.
To prevent this, manually add the token's contract address to your wallet's interface before sending the funds. You can find this address on a block explorer like Etherscan or a data site like CoinGecko. By adding it beforehand, your balance will appear as soon as the transfer completes.
With your wallet ready and recovery phrase secured, it's time to move your crypto. Follow these steps meticulously on either the Coinbase website or mobile app.
First, log into your Coinbase account. On the website, find the blue “Send & Receive” button in the top-right corner. On the app, tap the blue button at the bottom with two arrows.
Next, choose which crypto to send. This step is critical. Sending Bitcoin (BTC) to an Ethereum (ETH) address will result in a permanent loss of funds.
After selecting your crypto, Coinbase will ask for the destination address. This is where you paste the address copied from your non-custodial wallet.
One wrong character can send your crypto into a digital void. Always use the double-check method:
0xAbC1...dEf9, confirm that Coinbase shows both 0xAbC1 and dEf9 perfectly.This three-part check is your best defense against human error and clipboard-hijacking malware.
The "Send a Test Transaction First" RuleBefore moving a large amount, send a small test transaction first—about $5 or $10. Wait for it to arrive safely in your wallet, and only then send the full amount. The extra network fee is cheap insurance against a catastrophic mistake.
With the address and network confirmed, enter the amount, review the network fee, and hit send. Finalize the transfer with your two-factor authentication (2FA) code.
It all comes down to having your wallet prepared, your address triple-checked, and your seed phrase secured.
Here’s a quick guide for both platforms.
Once confirmed, you can track the transaction's progress in your Coinbase history using the provided transaction ID (TxID) on a block explorer.
When moving crypto, your choice of blockchain network determines the speed and cost of the transfer. Sending a stablecoin like USDC on the Ethereum network can be expensive, while sending the same token over Solana or Base costs pennies and arrives in seconds.
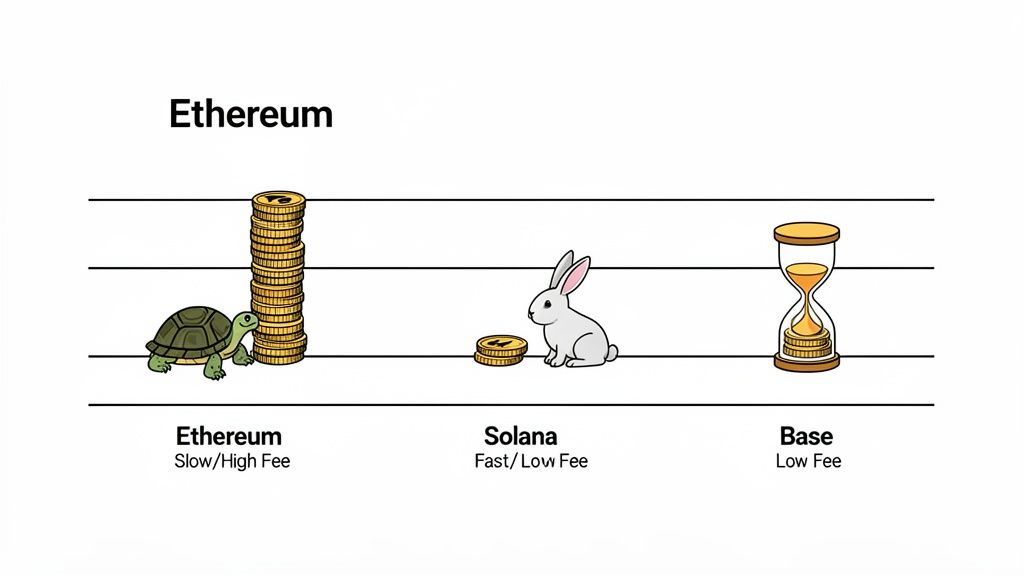
The differences in speed and cost are massive. The right network depends on your priority: speed, low fees, or access to a specific DeFi ecosystem.
Note: These are estimates. Real-time fees vary based on network congestion.
Experienced crypto users time their transfers. Network congestion, especially on Ethereum, often spikes during U.S. trading hours. By sending funds during quieter times, like late at night or on weekends, you can significantly reduce transaction fees. For more details, see our guide on Ethereum gas fees.
This is a core professional strategy. While Coinbase can bundle internal transfers to save money—like moving 5,500 BTC between its own wallets for a single network fee—your personal withdrawal is a separate transaction on the blockchain, and you bear the full cost of network congestion.
To an on-chain analyst, a large crypto outflow from an exchange is a market signal. The fee paid can even hint at urgency, suggesting a trader is paying a premium to get capital into a DeFi protocol before a big market move.
By paying attention to network conditions and choosing the right chain, you can ensure your funds arrive quickly and affordably.
Even with careful planning, issues can arise. Most problems are common and fixable.
Your first step should always be a block explorer. For Ethereum, use Etherscan. For Solana, use Solscan. Paste the transaction hash (TxID) from your Coinbase history into the appropriate explorer to see the real-time status of your transfer.
This is the most common issue, especially during high market volatility. A "pending" status means Coinbase has sent your transaction, but the network hasn't confirmed it yet.
If Coinbase and the block explorer show the transaction as "Success" but your wallet balance is zero, don't panic. Your crypto is almost certainly safe.
This is typically a display issue within your wallet app. The crypto is at your address on the blockchain; your wallet just hasn't registered it yet.
This is common with ERC-20 tokens. Your wallet needs the token's contract address to display the balance.
Here’s the fix:
Coinbase's security algorithms may place a temporary hold on a withdrawal, usually for 24 to 72 hours, to protect your account from unauthorized activity.
Your withdrawal might be flagged if you:
Check your email (including spam) for a notification from Coinbase. Unfortunately, you must wait for their security team to clear the hold.
This is the most serious mistake and is not always reversible. For example, sending USDC on the Base network to an Ethereum-only address.
Recovery depends on whether your destination wallet supports the network you mistakenly used. If it does, you may be able to recover the funds by switching network settings in your wallet.
However, if the receiving wallet does not support the network, the funds are likely lost forever. This is why triple-checking the network before sending is the most crucial step.
Sending crypto for the first time can be nerve-wracking. Here are answers to common questions.
In most jurisdictions, including the U.S., simply moving crypto you own from an exchange to a personal wallet is not a taxable event.
It's like moving money between your own bank accounts. Taxable events typically occur when you sell for cash, trade for another crypto, or make a purchase. However, the transfer does create a new transaction on the blockchain, so keeping good records is wise. When in doubt, consult a tax professional.
The time depends on two factors: Coinbase's processing speed (usually minutes) and the blockchain's congestion.
Here’s a rough guide:
During high network traffic, these times can increase. You can always track the status in your Coinbase account using the transaction ID (TxID) on a block explorer.
Network speed is critical for time-sensitive activities like DeFi trading. Choosing a faster, low-fee network provides a significant advantage.
This is a critical security step.
Always use your wallet's built-in "copy" button to avoid typos. After pasting the address into Coinbase, always double-check the first 4-5 and last 4-5 characters to ensure they match what your wallet displays.
This simple check protects you from clipboard-hijacking malware that substitutes a hacker's address for yours. For large transfers, confirm the full address on a hardware wallet's physical screen. Never type out an address by hand.
Ready to turn on-chain data into actionable trading signals? Wallet Finder.ai helps you discover the strategies of top-performing wallets and get real-time alerts on their trades. Start your 7-day trial and see what the smart money is doing. Find your edge with Wallet Finder.ai.

A premier DeFi analytics platform empowering traders to discover and analyze profitable blockchain wallets, trades and tokens.

