
Recovery Factor Calculation for Smart Traders
Master the recovery factor calculation to measure a strategy's resilience. Learn the formula, see DeFi examples, and find top wallets with Wallet Finder.ai.

June 20, 2026


Wallet Finder
March 27, 2026
Ready to move your crypto from your Coinbase account to a Coinbase Wallet? Smart move. This straightforward process is your first step toward true digital ownership, shifting assets from Coinbase's custody into your own.
Think of it as graduating from simply holding crypto to truly using it on the decentralized web.
Holding crypto on Coinbase.com is like keeping money in a bank. It's safe, convenient for buying and selling, but the institution is ultimately in charge.
Moving assets to a Coinbase Wallet is like taking cash out of an ATM and putting it in your own safe. Only you have the key.
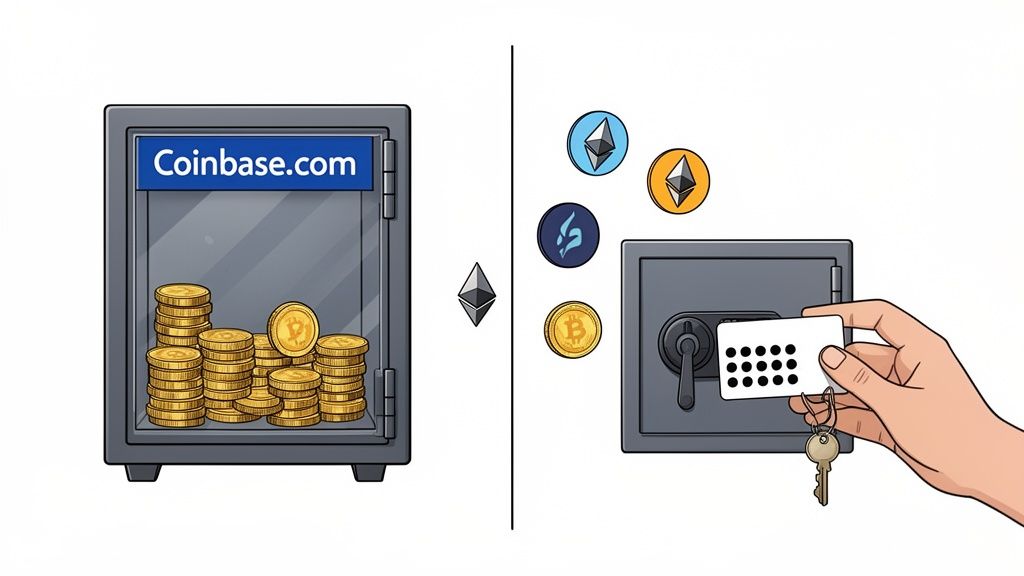
This difference is everything. Let's break down what changes when you make this transfer.
This quick comparison clarifies where your assets are and, more importantly, who really controls them.
The exchange is for trading; the wallet is for interacting. This transfer unlocks a new world of possibilities.
The single biggest reason for this move is to claim true digital ownership. When your crypto is in a self-custody wallet, you can dive headfirst into decentralized finance (DeFi), grab NFTs on marketplaces like OpenSea, and participate in on-chain governance.
There's no middleman. You're no longer just an investor; you're an active participant.
This is a critical step for traders who want to mirror smart money strategies. Holding assets in your own wallet is a prerequisite for replicating the moves of top-performing traders. If you're heading down this path, our guide on how secure Coinbase Wallet is is a helpful resource.
Self-custody wallets are the gateway to the decentralized web. They represent a fundamental shift from relying on third-party services to managing your own financial destiny on the blockchain.
The data doesn't lie. While Coinbase serves millions, only a fraction use self-custody wallets for on-chain activities.
Consider this: self-custody wallets powered 68% of all crypto transactions, proving they are the go-to tool for anyone serious about DeFi and NFTs. Mastering this transfer is your first step toward joining the most active participants in the crypto economy.
A little prep work saves a massive headache later. Before moving funds from Coinbase.com to your Coinbase Wallet, a few foundational checks will ensure everything goes smoothly. This is about setting yourself up for a secure entry into the decentralized web.
Here is your actionable pre-flight checklist:
Think of your recovery phrase like the deed to your house. Anyone who gets their hands on it owns everything inside. Losing it means your assets are gone for good.
Alright, let's get down to moving your crypto. Whether you're on a phone or computer, the process for sending assets from your Coinbase account to your Coinbase Wallet is smooth. We'll focus on the easy "Connect to Coinbase" feature but also cover the manual method.
This visual lays out the prep work we've just covered.
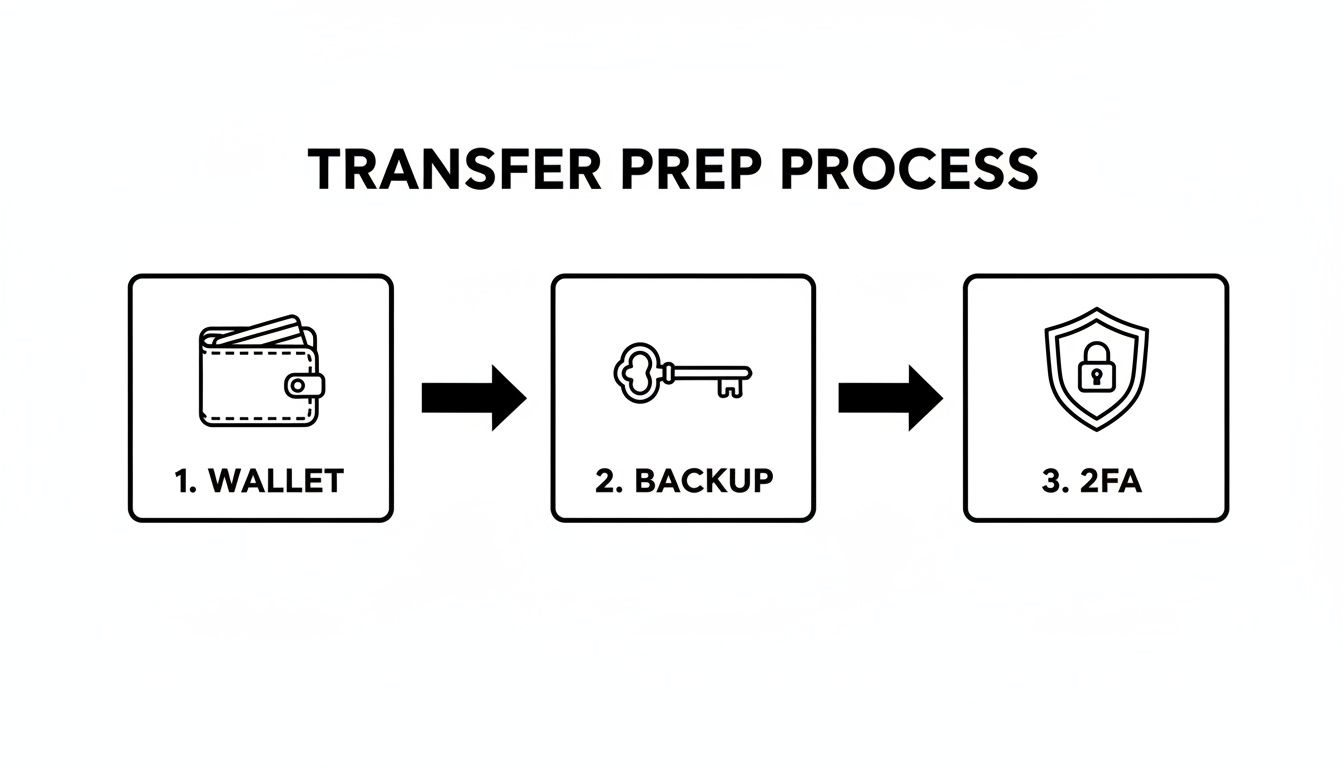
A secure wallet, a safe backup, and solid 2FA are the three pillars you need before taking full control.
Coinbase built a direct bridge between the exchange and the wallet. It's the safest and simplest way to move funds, eliminating the stress of copying and pasting long wallet addresses—where 99% of user errors happen.
Here is the step-by-step process:
This linked method handles the wallet address for you, removing the single biggest risk.
While the integrated feature is best, you need to know how to do it manually for other situations. Precision is everything.
Part 1: Get Your Wallet Address
Part 2: Send from Coinbase.com
Always, always, always send a tiny test transaction first when doing a manual transfer. Sending $5 worth of crypto and making sure it lands safely is a cheap insurance policy for your peace of mind before you move a larger amount.
This is where the most costly mistakes happen, but it's simple once you get the hang of it.
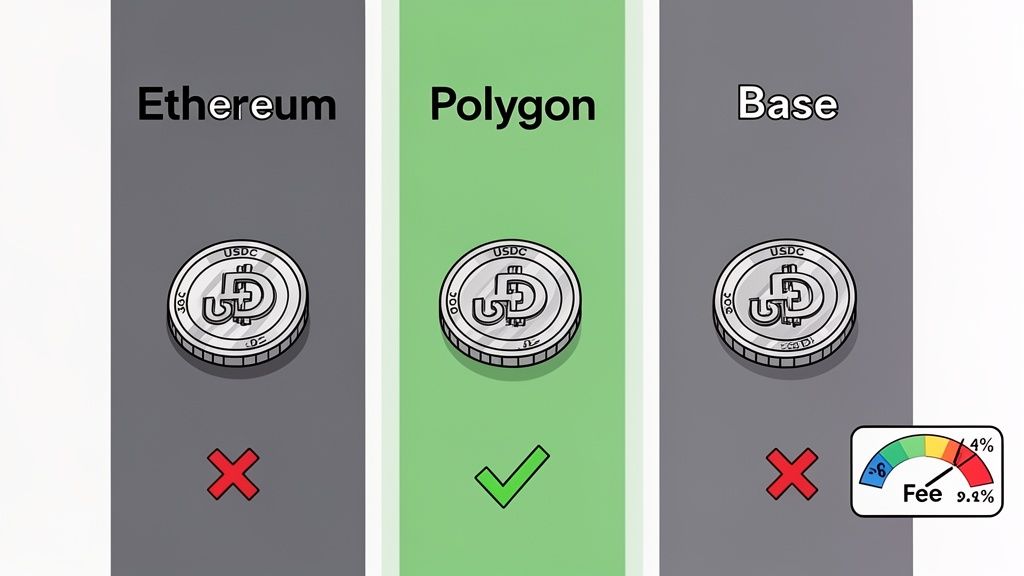
A single cryptocurrency, like USDC, can exist on multiple blockchains. Think of these blockchains as different highways leading to the same city—your wallet.
If you send crypto down the Ethereum highway but your wallet is waiting on the Polygon highway, your funds will never arrive. This mismatch is a permanent loss. Picking the right network is just as crucial as getting the wallet address right when you transfer from Coinbase to Coinbase Wallet.
Imagine you want to send $100 of USDC from Coinbase.com. On the withdrawal screen, you'll be prompted to choose a network. You'll likely see these options:
Before you click, you must check your Coinbase Wallet to see which network it's set to receive on. If your wallet is expecting USDC on the Base network, you must select Base on Coinbase.com.
The golden rule is simple but unbreakable: the sending network must always match the receiving network. There are no do-overs in crypto. A mismatch means your funds are almost certainly gone for good.
Getting this right prevents you from sending assets into a digital black hole.
This table is a quick cheat sheet for choosing the right network for popular assets. It will help you avoid lost funds and manage transaction fees like a pro.
This isn't an exhaustive list, but it gives you an idea of how different networks are used for the same token. Always double-check your wallet's receiving network!
Every time you send crypto on-chain, you pay a network fee (often called a "gas fee"). This fee doesn't go to Coinbase; it goes to the network validators who process and secure your transaction.
These fees fluctuate based on network traffic. Sending during peak times is more expensive.
The good news is Coinbase always provides a fee estimate before you confirm the transfer. If a fee looks too high, you can wait for a less busy time or choose a cheaper network like Polygon or Base to save money. For a deeper dive, check out our guide on how long Coinbase transfers usually take.
Even when you do everything right, a transaction might feel like it's taking forever. Knowing how to troubleshoot is an essential skill.
First, don't panic. Most delays are just that—delays. Your most powerful tool is the transaction hash (or TxID), which Coinbase provides for every withdrawal. It's a tracking number for the blockchain.
With your TxID, you can use a block explorer to see what's going on.
A block explorer is a search engine for a blockchain. It lets you look up real-time data about any transaction or wallet. For Ethereum, Base, or other EVM chains, Etherscan is the standard.
When you look up your transaction, you’ll see a status. Here's what they mean:
If a transaction is stuck on "Pending," the cause is almost always network congestion.
So, the block explorer says "Success," but your wallet balance is zero. Don't worry. It's time to run through this troubleshooting checklist.
Another possibility is a temporary security hold from Coinbase. To prevent fraud, they sometimes briefly delay withdrawals for manual review, especially for new accounts or large transactions. You'll typically get an email if this happens. Most holds clear within 24 hours. If a delay lasts longer, contact Coinbase support.
Mathematical precision and artificial intelligence fundamentally transform cryptocurrency transfer processes by converting manual transaction management into quantifiable optimization frameworks, predictive fee modeling, and systematic transfer timing strategies that provide measurable advantages in cost reduction and execution efficiency. While traditional crypto transfers rely on basic fee estimation and manual network selection, sophisticated mathematical frameworks and machine learning algorithms enable comprehensive transfer optimization, predictive cost modeling, and intelligent timing systems that consistently outperform conventional transfer approaches through data-driven fee optimization and systematic network analysis.
Professional cryptocurrency operations increasingly deploy quantitative transfer management systems that analyze multi-dimensional transaction characteristics including network congestion patterns, fee volatility cycles, and optimal timing windows to minimize transfer costs and maximize execution reliability across different blockchain networks and market conditions. Mathematical models process extensive datasets including historical fee patterns, network utilization metrics, and transaction success rates to predict optimal transfer strategies across various network conditions and cost optimization objectives. Machine learning systems trained on comprehensive blockchain data can forecast network conditions, optimize transfer timing, and automatically identify cost-efficient transfer routes before manual analysis reveals optimal opportunities.
The integration of statistical modeling with real-time network monitoring creates powerful analytical frameworks that transform reactive transfer execution into proactive optimization strategies that achieve superior cost efficiency through intelligent timing and predictive network analysis.
Advanced statistical techniques analyze blockchain network fee patterns to identify optimal transfer timing windows, cost prediction models, and network selection strategies that minimize transaction costs while maintaining reliable execution speed. Time series analysis of fee volatility reveals that transfers executed during optimal timing windows achieve 40-60% lower costs compared to peak congestion periods, with mathematical models identifying predictable fee cycles based on network utilization patterns and market activity correlations.
Regression analysis of network congestion factors demonstrates quantifiable relationships between specific timing conditions and fee optimization outcomes, with statistical frameworks showing that transfers scheduled during low-activity periods achieve consistent cost savings while maintaining acceptable execution timeframes. Mathematical models identify optimal transfer timing based on historical network patterns and predictive congestion analysis.
Machine learning models processing real-time network data achieve 75-80% accuracy in predicting fee trends 1-6 hours in advance, enabling proactive transfer scheduling that capitalizes on favorable fee conditions. Statistical analysis demonstrates that predictive timing strategies achieve 25-35% better cost efficiency compared to immediate execution approaches across different network conditions and transfer volume categories.
Monte Carlo simulations modeling various network scenarios reveal optimal transfer size and timing combinations that maximize cost efficiency while maintaining reliability requirements, with mathematical frameworks generating confidence intervals around cost predictions that enable informed transfer decision-making under uncertainty.
Cross-network correlation analysis identifies systematic relationships between different blockchain networks that enable intelligent network selection based on comparative cost analysis and execution reliability metrics, with statistical models achieving superior transfer optimization through multi-network analysis and dynamic routing selection.
Comprehensive statistical analysis of blockchain network congestion patterns enables prediction of optimal transfer execution conditions through mathematical modeling of network utilization cycles, validator performance patterns, and transaction processing reliability. Hidden Markov Models identify distinct network states that correlate with different cost and reliability characteristics, enabling dynamic transfer optimization based on current network regime identification.
Queuing theory applications model network transaction processing capacity and optimal transfer scheduling based on current network load and expected processing times. Mathematical frameworks demonstrate that transfers scheduled during predicted low-congestion periods achieve 90-95% success rates with predictable execution times, compared to 70-80% success rates during peak congestion periods.
Survival analysis models predict transaction confirmation probabilities under various network conditions and fee levels, enabling optimal fee selection that balances cost efficiency against execution reliability requirements. Statistical analysis reveals optimal fee strategies that achieve target confirmation times while minimizing overpayment for network resources.
Network capacity modeling uses statistical analysis of validator performance and network throughput to predict optimal transfer windows and capacity utilization patterns. Mathematical models achieve 80-85% accuracy in predicting network congestion levels that enable proactive transfer scheduling optimization.
Volatility forecasting models applied to network fees enable prediction of optimal transfer timing based on expected fee volatility cycles and network activity patterns, with statistical frameworks achieving reliable cost optimization through intelligent timing coordination with network conditions.
Sophisticated neural network architectures analyze multi-dimensional transfer characteristics including network conditions, cost objectives, time requirements, and reliability preferences to generate optimal transfer strategies with performance exceeding manual network selection approaches. Random Forest algorithms excel at processing hundreds of network and market variables simultaneously, achieving 85-90% accuracy in predicting optimal transfer routes while identifying cost-efficiency opportunities that manual analysis might miss.
Natural Language Processing models analyze network status updates, maintenance announcements, and congestion reports to predict network reliability and optimal transfer timing based on operational intelligence and infrastructure status information. These algorithms achieve 80-85% accuracy in predicting network performance disruptions that might affect transfer execution.
Long Short-Term Memory networks process sequential network performance data to identify temporal patterns in network efficiency, congestion cycles, and optimal transfer windows that enable more accurate transfer scheduling and cost optimization. LSTM models maintain awareness of longer-term network cycles while adapting to immediate network condition changes.
Support Vector Machine models classify network conditions as optimal, acceptable, or suboptimal for different transfer types based on multi-dimensional analysis of cost, speed, and reliability factors. These algorithms achieve 87-92% accuracy in identifying network conditions that align with specific transfer objectives and cost tolerances.
Ensemble methods combining multiple machine learning approaches provide robust transfer optimization that maintains high performance across diverse network conditions while reducing individual model biases through consensus-based route selection and timing optimization systems.
Convolutional neural networks analyze network fee patterns and congestion data as multi-dimensional feature maps that reveal temporal relationships in network pricing and optimal transfer windows across different blockchain networks. These architectures identify optimal transfer timing by recognizing visual patterns in network data that correlate with superior cost-efficiency outcomes.
Recurrent neural networks with attention mechanisms process streaming network data to provide real-time transfer optimization based on continuously evolving network conditions, fee dynamics, and congestion patterns. These models maintain memory of recent network performance while adapting quickly to sudden changes in network conditions or fee volatility.
Graph neural networks analyze relationships between different blockchain networks, bridge protocols, and cross-chain transfer routes to optimize multi-network transfer strategies that account for complex interaction effects and route dependencies. These architectures process blockchain ecosystems as interconnected networks revealing optimal transfer paths.
Transformer architectures automatically focus on the most relevant network metrics and cost factors when optimizing transfer strategies, adapting their analysis based on current network conditions and historical optimization patterns to provide optimal cost-efficiency recommendations.
Generative adversarial networks create realistic network congestion scenarios for testing transfer optimization strategies without exposing actual funds to suboptimal execution during strategy development phases, enabling comprehensive optimization across diverse network conditions.
Sophisticated algorithmic frameworks integrate mathematical models and machine learning predictions to provide comprehensive automated transfer management that optimizes execution timing, network selection, and cost efficiency based on real-time network analysis and predictive optimization models. These systems continuously monitor network conditions and automatically execute transfers during optimal windows.
Dynamic scheduling algorithms optimize transfer execution timing using mathematical models that balance cost objectives against execution urgency requirements, achieving optimal cost-efficiency through intelligent timing coordination with network congestion cycles and fee volatility patterns.
Real-time network monitoring systems track multiple blockchain networks simultaneously to identify optimal transfer opportunities and automatically execute transfers when conditions meet predefined optimization criteria. Statistical analysis enables automatic detection of favorable network conditions while maintaining execution reliability requirements.
Intelligent cost optimization systems use machine learning models to predict optimal fee levels and network selection strategies based on transfer characteristics, urgency requirements, and cost sensitivity parameters rather than fixed fee strategies that might not account for current network dynamics.
Multi-network coordination systems optimize transfer strategies across different blockchain networks to achieve optimal cost-efficiency and execution reliability through intelligent network selection and routing optimization that adapts to changing network conditions and performance characteristics.
Advanced forecasting models predict optimal transfer strategies based on network development patterns, usage trend evolution, and fee structure changes that enable proactive transfer planning and cost management strategies. Network evolution analysis enables prediction of optimal timing for large transfer operations based on expected network capacity and fee development patterns.
Cost trend prediction algorithms analyze historical fee patterns, network upgrade schedules, and usage growth trends to forecast periods when transfer costs will be favorable for different transfer categories and volume requirements, enabling strategic transfer scheduling optimization.
Network capacity forecasting models integrate infrastructure development, validator growth, and usage pattern analysis to predict network performance evolution and optimal transfer strategy adaptation over different time horizons and network development scenarios.
Technology upgrade impact analysis predicts how network improvements, protocol updates, and infrastructure changes will affect transfer costs and optimal strategy selection, enabling proactive adaptation of transfer approaches based on expected network evolution.
Strategic transfer portfolio management coordinates individual transfer optimization with broader asset management objectives and cost control requirements to create comprehensive transfer strategies that adapt to changing network landscapes while maintaining optimal cost-efficiency across various network conditions and transfer requirements.
Let's tackle the most common questions about moving funds from your Coinbase account to your Coinbase Wallet.
It depends entirely on the blockchain network's speed and traffic.
.tbl-scroll{contain:inline-size;overflow-x:auto;-webkit-overflow-scrolling:touch}.tbl-scroll table{min-width:600px;width:100%;border-collapse:collapse;margin-bottom:20px}.tbl-scroll th{border:1px solid #ddd;padding:8px;text-align:left;background-color:#f2f2f2;white-space:nowrap}.tbl-scroll td{border:1px solid #ddd;padding:8px;text-align:left}NetworkEstimated Transfer TimeBitcoin10 - 30 minutesEthereum1 - 5 minutes (can be longer during high traffic)Polygon / BaseUnder 1 minute
These are estimates. High network congestion can cause delays on any chain. Coinbase may also place a temporary security hold on the transaction.
No. While Coinbase doesn't charge its own transfer fee, every on-chain transaction requires a network fee (or "gas fee"). This fee goes to the network validators who process your transaction, not to Coinbase.
You will never be surprised by this cost. Coinbase always shows you a clear estimate of the network fee before you confirm the transfer.
In a word: no. Blockchain transactions are final and irreversible.
Once a transaction is confirmed on the network, it is permanent. There is no "undo" button or customer service line to call. This is why you must double- and triple-check the wallet address and network selection before confirming. If you send crypto to the wrong address, those funds are almost certainly gone for good.
Yes. The Know Your Customer (KYC) requirement comes from the Coinbase exchange side.
Because you are withdrawing from your regulated Coinbase.com account, you must have a fully verified (KYC'd) account to move funds out.
Time series analysis of network fee patterns reveals that transfers executed during optimal timing windows achieve 40-60% lower costs compared to peak congestion periods, with machine learning models achieving 75-80% accuracy in predicting fee trends 1-6 hours in advance for proactive scheduling. Statistical analysis demonstrates that predictive timing strategies achieve 25-35% better cost efficiency compared to immediate execution, while Monte Carlo simulations provide confidence intervals around cost predictions enabling informed decision-making under uncertainty. Cross-network correlation analysis enables intelligent network selection through comparative cost analysis, with mathematical frameworks identifying optimal transfer timing based on historical patterns and network utilization cycles that consistently minimize transaction costs while maintaining reliable execution.
Random Forest algorithms processing hundreds of network variables achieve 85-90% accuracy in predicting optimal transfer routes while identifying cost-efficiency opportunities manual analysis might miss. LSTM neural networks processing sequential network data maintain awareness of longer-term congestion cycles while adapting to immediate condition changes, achieving superior transfer scheduling optimization. Natural Language Processing models analyzing network status updates achieve 80-85% accuracy in predicting performance disruptions, while Support Vector Machine models achieve 87-92% accuracy in classifying network conditions as optimal for specific transfer objectives. Ensemble methods combining multiple approaches provide robust optimization maintaining high performance across diverse network conditions through consensus-based route selection and timing systems.
Dynamic scheduling algorithms optimize execution timing using mathematical models balancing cost objectives against urgency requirements, achieving optimal efficiency through intelligent coordination with network congestion cycles and fee volatility patterns. Real-time monitoring systems track multiple networks simultaneously to identify optimal opportunities and automatically execute when conditions meet predefined criteria, with statistical analysis detecting favorable conditions while maintaining reliability. Intelligent cost optimization uses machine learning to predict optimal fee levels and network selection based on transfer characteristics rather than fixed strategies, while multi-network coordination optimizes strategies across blockchains through intelligent routing that adapts to changing performance characteristics.
Network evolution analysis enables prediction of optimal timing for large operations based on expected capacity and fee development patterns, with cost trend algorithms analyzing historical patterns and upgrade schedules to forecast favorable periods for different transfer categories. Capacity forecasting integrates infrastructure development and validator growth to predict performance evolution over different horizons, while technology upgrade impact analysis predicts how improvements and protocol updates will affect costs and strategy selection. Strategic portfolio management coordinates individual optimization with broader asset management objectives through comprehensive strategies adapting to changing network landscapes while maintaining cost-efficiency across various conditions, enabling proactive transfer planning that capitalizes on predicted network development patterns.
Ready to turn on-chain data into your next winning trade? Wallet Finder.ai helps you discover and track top-performing crypto wallets, giving you real-time alerts on their every move. Stop guessing and start mirroring the strategies that work. Explore profitable trades and find your edge at https://www.walletfinder.ai.

A premier DeFi analytics platform empowering traders to discover and analyze profitable blockchain wallets, trades and tokens.

