
Recovery Factor Calculation for Smart Traders
Master the recovery factor calculation to measure a strategy's resilience. Learn the formula, see DeFi examples, and find top wallets with Wallet Finder.ai.

June 20, 2026


Wallet Finder
February 15, 2026
If you want to really get ahead in the crypto market, you have to learn how to send funds from Coinbase to a wallet you actually control. This isn't just a simple transfer; it's the step that takes you from being a passive investor on a centralized exchange to an active player in decentralized finance (DeFi). It unlocks a whole world of strategies and opportunities that are impossible to access otherwise.
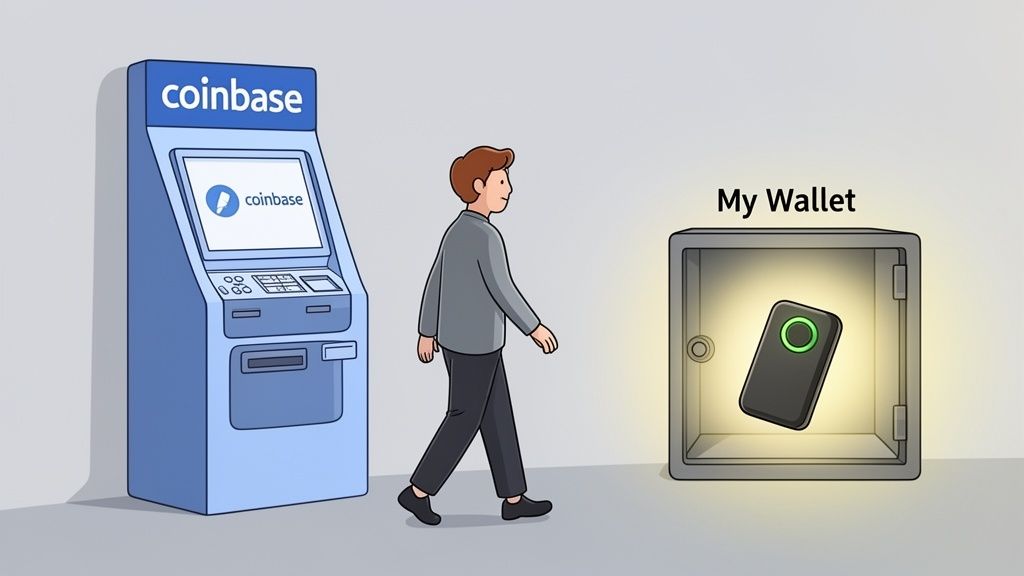
Sure, keeping your crypto on Coinbase is easy. But there's a catch: you don't truly own it. You're trusting the exchange to hold your assets for you, which brings us to the age-old crypto mantra: "not your keys, not your crypto."
When you move your funds to a personal, non-custodial wallet—think MetaMask, Phantom, or a hardware wallet—you gain absolute ownership. For anyone serious about DeFi, this isn't just a recommendation; it's a necessity.
The number one reason to make the move is to achieve total sovereignty over your funds. With your crypto in a personal wallet, you—and only you—can access and move it. This instantly shields you from exchange-specific risks like sudden outages, account freezes, or policy changes that might lock you out of your own money.
For a DeFi trader, this level of control is non-negotiable. It’s the prerequisite for interacting directly with blockchain protocols, cutting out the middleman entirely. This direct line opens up a universe of possibilities:
The real edge in crypto trading is found on-chain. The top traders aren't waiting for tokens to appear on Coinbase. They're finding them on decentralized exchanges and engaging with protocols directly from their own wallets.
Beyond just holding your own keys, a personal wallet is the command center for executing sophisticated trading strategies. Centralized exchanges offer a very limited menu. The on-chain world is where the real action and innovation happen.
For example, with a tool like Wallet Finder.ai, you can track and even mirror the moves of highly successful traders. But here’s the thing: you can only act on that intel if you can connect your own wallet to a decentralized exchange (DEX) in real-time. You can't copy-trade an on-chain whale from inside your Coinbase account.
By moving your funds, you put yourself in a position to act on market intelligence instantly. It’s how you turn raw on-chain data into profitable trades.
Before you can send anything from Coinbase, you need a destination. The wallet you choose isn't just a holding place; it's your key to the entire DeFi world, and this decision is your first real strategic move. The right choice comes down to your goals, how much risk you're comfortable with, and which blockchain ecosystems you plan to dive into.
Think of wallets in two main camps: hot wallets (software connected to the internet) and cold wallets (offline hardware devices). Hot wallets like MetaMask are built for the daily grind of DeFi, while cold wallets like a Ledger are designed for locking down serious funds you don't plan on touching often.
Your wallet choice is chain-specific. You can't just use a Solana wallet for Ethereum dApps, and vice versa. It’s like needing a different bank account for dollars and euros.
The best strategy for most active traders is a hybrid approach. Use a hot wallet like MetaMask for your "trading stack" and a cold wallet like Ledger for your long-term "vault." This setup gives you both agility and peace of mind.
Once your wallet is ready to go, finding your receiving address is simple. This long string of characters is basically your crypto bank account number—it’s public and is what you’ll give Coinbase to direct the funds. While the look and feel can vary slightly between wallets, the process is almost identical everywhere.
Let's walk through it with MetaMask, a real-world example:
0x1a2b...c3d4. Just click on it, and it'll automatically copy to your clipboard.This is the single most important step in the entire process. One mistake here, and your funds could be gone forever. If you need a more detailed breakdown, you can learn how to find your crypto wallet address.
A quick pro tip: Always, always, always double-check the first and last four characters of the address after you paste it into Coinbase. It takes two seconds and can save you from a very bad day.
Here's a scenario that destroys beginners: You buy $10,000 worth of ETH on Coinbase. You want to move it to your MetaMask immediately to catch a hot DeFi opportunity. You hit withdraw. Coinbase says: "On hold for 72 hours."
Your opportunity evaporates. Your capital is stuck. And you had no idea this restriction existed.
Coinbase implements withdrawal holds for security and fraud prevention. Understanding these holds before you buy can save you from missing time-sensitive trades and allow you to plan your capital deployment strategically.
When you buy crypto on Coinbase using a bank transfer (ACH), there's typically a 5-7 day hold before you can withdraw that crypto off the platform. This surprises people because Coinbase gives you immediate access to trade the crypto within their ecosystem—but not to move it externally.
The reason: ACH transfers are reversible for up to 5 business days. Coinbase advances you the crypto immediately so you can start trading, but they don't actually have your money yet. If they let you withdraw immediately, you could buy crypto, send it to yourself, then reverse the ACH payment. That's fraud.
Timeline breakdown:
Day 0: You buy 1 ETH for $3,000 via ACHDay 0-1: You can trade that ETH for other coins on CoinbaseDay 0-7: You cannot withdraw ETH to an external walletDay 7+: Your ACH clears, withdrawal hold lifts, you can send anywhere
Workarounds:
Many traders keep a "hot" balance on Coinbase specifically for quick trades, separate from their long-term holdings. The hot balance stays on the exchange (no holds), while the bulk lives in self-custody after the hold period expires.
Even if your funds are fully settled, Coinbase can still place a 72-hour hold if you trigger certain security flags:
Triggers:
Real scenario: You always withdraw to your Ledger wallet. Today you set up a new MetaMask for DeFi and try to send $20,000 there. Coinbase flags this as suspicious (new address, large amount) and locks your withdrawal for 72 hours.
Protection strategies:
Whitelist addresses in advance: Many users don't know Coinbase has an "Address Book" feature. Add all your external wallets to this book and label them clearly. After a waiting period, these become trusted addresses with fewer restrictions.
Send a test transaction first: Before sending large amounts to a new address, send $10-50 first. This establishes the address as legitimate. Wait 24-48 hours, then send the bulk.
Avoid changing multiple settings at once: If you changed your password today, don't try to withdraw to a new address today. Space out security-sensitive actions by 3-5 days.
The frustrating truth: Coinbase's security holds are designed to protect you from hackers, but they also restrict legitimate users. Planning around these holds is part of the game.
This is the worst-case scenario. Your entire Coinbase account gets flagged for review and all withdrawals are frozen indefinitely. This happens when:
There's no set timeframe. It can take 3-30 days to resolve, depending on the issue. During this period, your crypto is completely inaccessible.
Prevention:
Complete KYC fully: Provide all requested documents immediately. Incomplete KYC is a common restriction trigger.
Never fund from mixers or privacy coins: Coinbase monitors the source of deposits. If you send ETH from Tornado Cash to Coinbase, expect an instant account freeze.
Don't use VPNs when accessing Coinbase: Masking your location raises red flags. If you're in the US, look like you're in the US.
Respond to Coinbase emails immediately: If they ask for additional verification, provide it within 24 hours. Ignoring these requests leads to restrictions.
If you get restricted, expect to go through Coinbase Support. Document everything: transaction IDs, screenshots, correspondence. The process is slow and frustrating, but resolution is possible if you're compliant.
Most guides assume you're transferring Bitcoin or Ethereum—native blockchain assets that are straightforward. But the moment you start moving ERC-20 tokens, stablecoins, or wrapped assets, the complexity skyrockets.
These advanced scenarios trip up even experienced traders, and the consequences range from "mildly annoying" to "total loss of funds."
Here's a mistake that happens daily: You buy $5,000 USDC on Coinbase. You send it to your MetaMask wallet to use in DeFi. It arrives successfully. Then you try to swap that USDC on Uniswap... and the transaction fails. "Insufficient funds for gas."
The problem: USDC is an ERC-20 token on Ethereum. To interact with it (swap, send, or do anything), you need ETH in your wallet to pay gas fees. But you only sent USDC. Now your $5,000 is stuck, and you can't move it without depositing ETH first.
The solution (before you send from Coinbase):
Send a small amount of ETH along with your ERC-20 tokens. General rule of thumb:
This ensures you can actually use your tokens when they arrive. Otherwise, you're forced to buy more native tokens through an on-ramp service (which has fees and delays) or deposit from another wallet.
Many beginners don't realize this until they're stuck. Plan ahead.
Wrapped tokens are confusing because they look identical to the original but behave differently. WETH (Wrapped Ethereum) looks like ETH but is technically an ERC-20 token. WBTC (Wrapped Bitcoin) represents Bitcoin but exists on Ethereum.
The complication: Coinbase might list both "ETH" and "WETH" or "BTC" and "WBTC" separately. If you accidentally send WETH to a wallet expecting ETH (or vice versa), the receiving wallet may not display it correctly.
Example disaster scenario:
You buy WBTC on Coinbase thinking it's regular Bitcoin. You send it to your hardware wallet's Bitcoin address. The transaction "succeeds" but your funds never appear. Why? Because WBTC exists on Ethereum, not the Bitcoin blockchain. You sent an Ethereum-based token to a Bitcoin address. Depending on the wallet, the funds might be permanently lost.
Protection:
Verify the blockchain before buying: When you buy a token on Coinbase, check which network it's on. WBTC is ERC-20 (Ethereum). Native BTC is on Bitcoin network. They're NOT interchangeable.
Send to the correct network address: Your MetaMask Ethereum address can receive WBTC. Your Ledger Bitcoin app address cannot.
Unwrap if needed: If you have WETH but need ETH, you must "unwrap" it (usually a simple swap on Uniswap or Curve). They're not automatically convertible.
This confusion has cost people millions. Don't be a statistic.
When you withdraw an obscure token from Coinbase, your wallet needs the token's contract address to display the balance. Sometimes it auto-detects. Sometimes it doesn't.
If it doesn't auto-detect, you have to manually add the token using its contract address. Here's where scammers strike: fake contract addresses.
Scam example:
You search "USDC contract address" on Google. A scam site ranks high and shows a fake address. You add it to MetaMask. Now your MetaMask displays a balance of "USDC"—except it's not real USDC. It's a worthless scam token using the USDC name.
You try to sell it on Uniswap. The transaction fails or you get pennies because the fake token has no value.
Protection:
Only get contract addresses from official sources:
For USDC on Ethereum, the official contract is:0xA0b86991c6218b36c1d19D4a2e9Eb0cE3606eB48
For USDC on Polygon:0x2791Bca1f2de4661ED88A30C99A7a9449Aa84174
Note how they're completely different addresses on different networks. Adding the wrong one renders your tokens invisible or displays fake balances.
Always verify on Etherscan: Paste the contract address into Etherscan. Check:
This 30-second check prevents a lifetime of regret.
Alright, let's get into the nuts and bolts of moving your crypto off Coinbase and into your own wallet. Whether you’re using the website or the mobile app, the process is pretty much the same. The one thing you absolutely have to nail is precision, especially when picking the right network.
Here is a step-by-step checklist to follow:
This is the moment of truth where you'll paste the wallet address you copied earlier. Seriously, double-check the first and last four characters to make sure they match. One wrong letter or number can send your funds into the digital abyss, and there's no "undo" button.
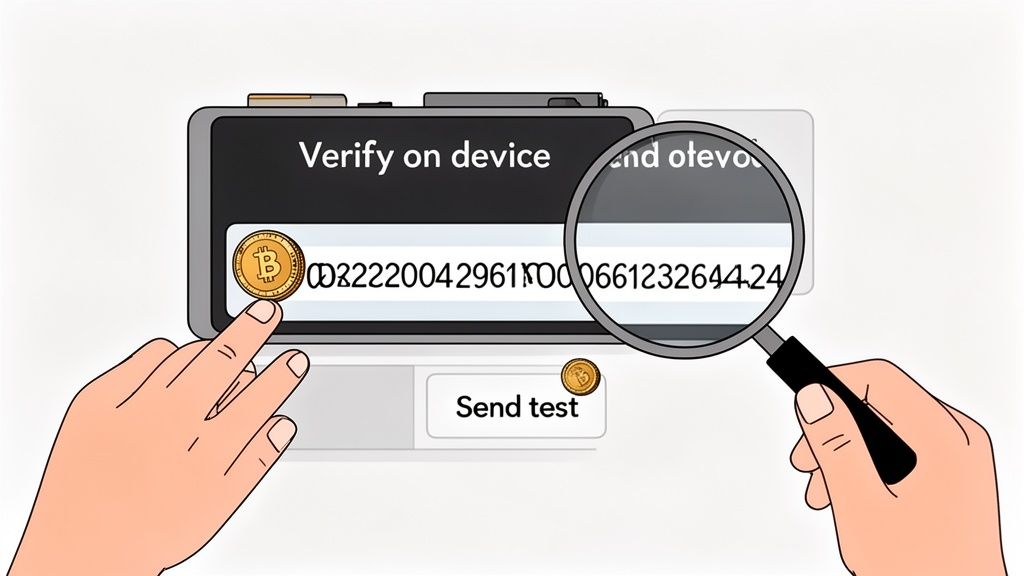
After you've pasted in the address, you'll decide how much you're sending. Here’s a pro tip that has saved me and countless others from costly mistakes: always send a small test transaction first.
Sure, sending a few bucks worth of crypto first will cost you an extra network fee, but think of it as the cheapest insurance policy you'll ever buy. Once that small test amount lands safely in your wallet, you can go back and send the rest with total confidence.
This simple visual breaks down how to get your wallet address securely before you even start the process on Coinbase.
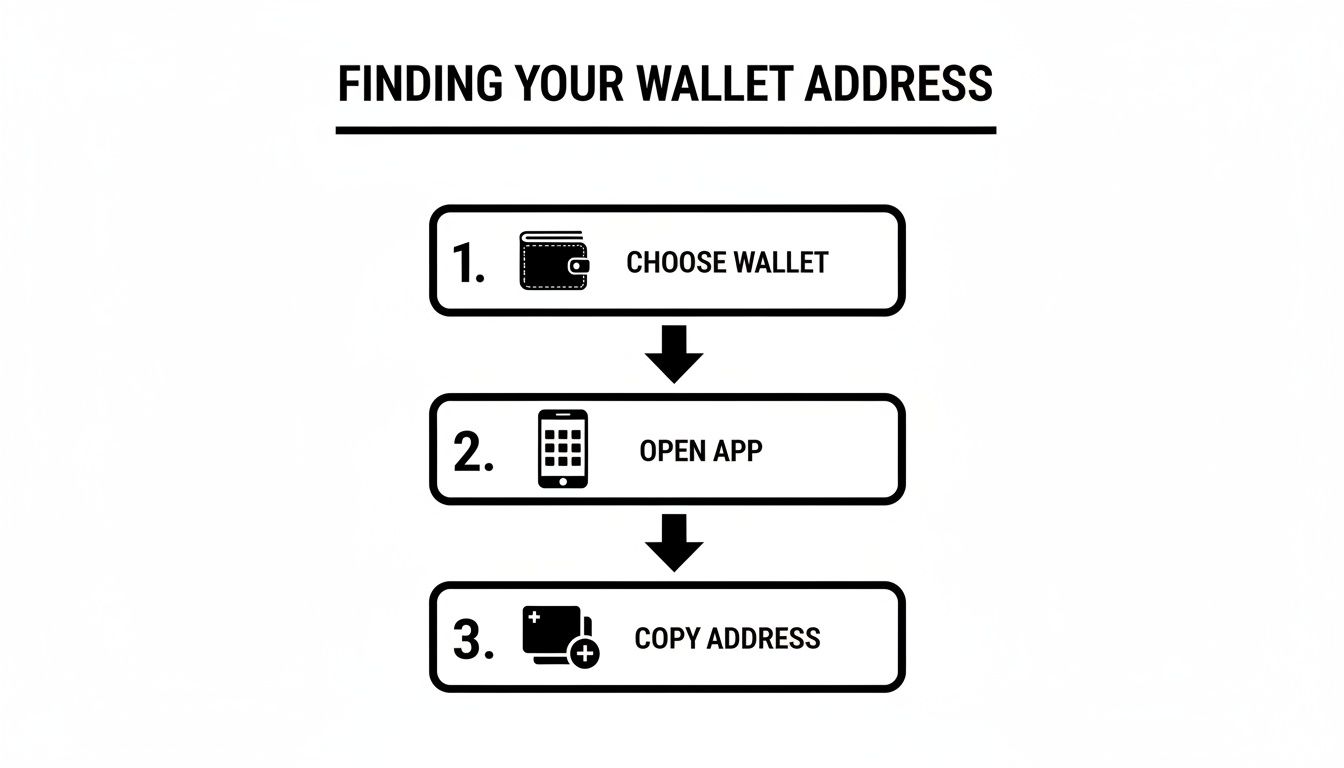
The idea is to be methodical: choose your wallet, open it, and copy the address. Following these three steps minimizes any chance of a copy-paste error.
This is it. Choosing the right network is probably the single most important decision in this whole process. It’s where a lot of people, especially those new to DeFi, mess up and lose money. Coinbase lets you send assets over different blockchains, and your choice determines the fees, speed, and exactly where your crypto ends up.
For instance, sending ETH on the Ethereum network is the default, but gas fees can be brutal during busy times. You could send it over a Layer 2 network like Base or Arbitrum for a fraction of the cost and get it there almost instantly. The catch? Your funds will be on that specific Layer 2, not the Ethereum mainnet.
Crucial Takeaway: The network you choose on Coinbase must match the network your receiving wallet is on. Sending an asset on the Base network to an address that's currently on the Ethereum network can lead to your funds being lost if you don't know how to recover them.
If you’re sending to the Coinbase Wallet, our guide on how to link Coinbase to Coinbase Wallet can help make the experience a bit smoother.
To really drive this point home, here’s a quick comparison of what it looks like to send a stablecoin like USDC across different networks you can choose on Coinbase.
The table below breaks down the typical costs, speeds, and best use cases for some of the most common networks available for withdrawals on Coinbase. It highlights the real-world trade-offs you're making with each choice.
NetworkAverage FeeConfirmation TimeBest ForEthereum$5 - $25+2-5 minutesDeFi on Ethereum mainnet, high-value transfers, maximum security.Base< $0.05~10 secondsInteracting with the Base ecosystem, low-cost trading, fast transactions.Polygon< $0.10~20 secondsAccessing Polygon's dApps, gaming, and NFT marketplaces.Solana< $0.01< 5 secondsHigh-frequency trading on Solana DEXs, engaging with the Solana ecosystem.
As you can see, the differences are huge. If you know you're headed straight to a dApp on Base, sending your funds directly there saves you time and money. Otherwise, you'd have to pay extra bridging fees to move it from Ethereum over to Base later.
After you’ve picked your network and reviewed the fees, Coinbase will prompt you for a final confirmation, usually with a 2FA code from your authenticator app. Once you approve it, your transaction is officially on its way.
Most guides assume you're transferring Bitcoin or Ethereum—native blockchain assets that are straightforward. But the moment you start moving ERC-20 tokens, stablecoins, or wrapped assets, the complexity skyrockets.
These advanced scenarios trip up even experienced traders, and the consequences range from "mildly annoying" to "total loss of funds."
Here's a mistake that happens daily: You buy $5,000 USDC on Coinbase. You send it to your MetaMask wallet to use in DeFi. It arrives successfully. Then you try to swap that USDC on Uniswap... and the transaction fails. "Insufficient funds for gas."
The problem: USDC is an ERC-20 token on Ethereum. To interact with it (swap, send, or do anything), you need ETH in your wallet to pay gas fees. But you only sent USDC. Now your $5,000 is stuck, and you can't move it without depositing ETH first.
The solution (before you send from Coinbase):
Send a small amount of ETH along with your ERC-20 tokens. General rule of thumb:
This ensures you can actually use your tokens when they arrive. Otherwise, you're forced to buy more native tokens through an on-ramp service (which has fees and delays) or deposit from another wallet.
Many beginners don't realize this until they're stuck. Plan ahead.
Wrapped tokens are confusing because they look identical to the original but behave differently. WETH (Wrapped Ethereum) looks like ETH but is technically an ERC-20 token. WBTC (Wrapped Bitcoin) represents Bitcoin but exists on Ethereum.
The complication: Coinbase might list both "ETH" and "WETH" or "BTC" and "WBTC" separately. If you accidentally send WETH to a wallet expecting ETH (or vice versa), the receiving wallet may not display it correctly.
Example disaster scenario:
You buy WBTC on Coinbase thinking it's regular Bitcoin. You send it to your hardware wallet's Bitcoin address. The transaction "succeeds" but your funds never appear. Why? Because WBTC exists on Ethereum, not the Bitcoin blockchain. You sent an Ethereum-based token to a Bitcoin address. Depending on the wallet, the funds might be permanently lost.
Protection:
Verify the blockchain before buying: When you buy a token on Coinbase, check which network it's on. WBTC is ERC-20 (Ethereum). Native BTC is on Bitcoin network. They're NOT interchangeable.
Send to the correct network address: Your MetaMask Ethereum address can receive WBTC. Your Ledger Bitcoin app address cannot.
Unwrap if needed: If you have WETH but need ETH, you must "unwrap" it (usually a simple swap on Uniswap or Curve). They're not automatically convertible.
This confusion has cost people millions. Don't be a statistic.
When you withdraw an obscure token from Coinbase, your wallet needs the token's contract address to display the balance. Sometimes it auto-detects. Sometimes it doesn't.
If it doesn't auto-detect, you have to manually add the token using its contract address. Here's where scammers strike: fake contract addresses.
Scam example:
You search "USDC contract address" on Google. A scam site ranks high and shows a fake address. You add it to MetaMask. Now your MetaMask displays a balance of "USDC"—except it's not real USDC. It's a worthless scam token using the USDC name.
You try to sell it on Uniswap. The transaction fails or you get pennies because the fake token has no value.
Protection:
Only get contract addresses from official sources:
For USDC on Ethereum, the official contract is:0xA0b86991c6218b36c1d19D4a2e9Eb0cE3606eB48
For USDC on Polygon:0x2791Bca1f2de4661ED88A30C99A7a9449Aa84174
Note how they're completely different addresses on different networks. Adding the wrong one renders your tokens invisible or displays fake balances.
Always verify on Etherscan: Paste the contract address into Etherscan. Check:
This 30-second check prevents a lifetime of regret.
The moment you send crypto from Coinbase to your own wallet, you're stepping into the role of your own bank. It's an incredible feeling of freedom, but it comes with a heavy dose of responsibility. There’s no customer service line to call if things go sideways.
That's why adopting a few core security habits isn't just a good idea—it's absolutely essential for protecting your capital.
The single most powerful habit you can build is the test transaction. Seriously. Before you move a significant amount, always send a tiny, nominal sum first. We're talking just a few dollars' worth. Wait for it to show up in your destination wallet. This simple check confirms your address is right, your network selection is correct, and it turns a potentially nerve-wracking transfer into a confident, routine action.
There's a nasty and growing threat out there called the address poisoning scam. Scammers will airdrop a tiny amount of a worthless token to your wallet. The trick? The transaction comes from an address that looks almost identical to one you've used before, often matching the first and last few characters.
Their whole game is to get you to carelessly copy their address from your transaction history for your next withdrawal instead of your own. It's a clever trap.
To protect yourself, you need to build these habits immediately:
This level of vigilance is your best defense against a sophisticated and potentially costly attack.
If you're using a hardware wallet like a Ledger or Trezor, you have one last, crucial line of defense. After you initiate the withdrawal on Coinbase, your physical device will light up and ask you to confirm the transaction details on its small screen.
Do not skip this step. This is your ultimate security backstop. Malware on your computer can change the address you see on your monitor, but it cannot change what's displayed on your hardware wallet's trusted screen.
Physically verifying the address on the device itself ensures that what you see is what you are actually signing. For anyone serious about self-custody, mastering these habits isn't negotiable. Your private keys are the bedrock of this entire journey; protecting them is everything. To really grasp this foundational concept, our guide on the importance of your wallet's seed phrase is a must-read.
Most users withdraw funds from Coinbase whenever they feel like it, with zero thought to optimization. This is fine for small amounts, but if you're moving significant capital or making frequent withdrawals, timing and batching can save you hundreds or thousands of dollars in fees.
Professional traders treat Coinbase withdrawals like a game of chess—every move is calculated for maximum efficiency.
Ethereum gas fees fluctuate wildly based on network congestion. Sending $10,000 USDC during peak hours can cost $50-150 in gas. The same transaction at 3am costs $5-15.
Gas fee patterns:
Expensive times (avoid):
Cheap times (target):
Tool for tracking gas:
Real example: You want to withdraw $50,000 USDC. Gas is 120 gwei (expensive). You wait 8 hours. Gas drops to 15 gwei. You just saved $80-100 in fees for waiting half a day.
For active traders making multiple weekly withdrawals, this adds up to thousands in annual savings.
Here's an inefficient pattern: You buy $1,000 worth of crypto on Coinbase. You withdraw it to your wallet. Gas fee: $15. Next week, you buy another $1,000. You withdraw it. Another $15 gas fee. You repeat this 10 times. You've paid $150 in gas fees.
Efficient alternative: You buy $1,000 per week for 10 weeks. At the end, you withdraw all $10,000 in one transaction. Gas fee: $15. You saved $135.
Batching rules:
If you're dollar-cost averaging (DCA): Let your buys accumulate on Coinbase for 2-4 weeks. Withdraw once per month instead of once per purchase.
If you're trading actively: Keep a working balance on Coinbase for active trades. Only withdraw when you're moving to cold storage or need to access DeFi.
Set a withdrawal threshold: "I only withdraw when I have $5,000+ to move." This ensures fees are always < 0.5% of the transfer amount.
Exception: Time-sensitive opportunities: If a DeFi pool is offering 500% APY and you need your funds now, pay the gas premium. Missing the opportunity costs more than saving $50 in fees.
Batching is about balancing efficiency with opportunity cost. There's no universal rule—just awareness of the trade-off.
Coinbase One is a $30/month subscription that includes:
The "zero fees" part is interesting. It doesn't eliminate network gas fees (those are paid to miners, not Coinbase), but it eliminates Coinbase's spread and service fees.
Is it worth it?
If you trade more than $3,000/month in volume, yes. You break even on fees saved. If you're also making frequent withdrawals (2+ per month), the savings compound.
If you're a buy-and-hold investor who withdraws once per quarter, skip it. The fees you'd save don't justify the monthly cost.
Many active DeFi users subscribe to Coinbase One specifically for the fee-free Coinbase-to-Coinbase Wallet pipeline. They use Coinbase for on-ramping fiat, then move it to Coinbase Wallet for zero fees, then bridge to other chains from there.
It's a strategic optimization that reduces the total friction cost of getting fiat into DeFi.
Even when you do everything right, crypto transfers don't always go according to plan. Seeing your transaction stuck on "pending" after sending it from Coinbase can be nerve-wracking, but don't panic. There's almost always a good explanation.
Most of the time, delays aren't a sign that your crypto is lost forever. It usually just means the network is clogged with traffic or that Coinbase is running a standard security review on their end. The first step is to stay calm and play detective.
Once Coinbase broadcasts your transaction, they'll give you a transaction hash (often called a TxID). This unique string of letters and numbers is your golden ticket to figuring out what’s happening on the blockchain.
Think of a block explorer as a search engine for a specific blockchain. It’s a public record where you can see the real-time status of any transaction, and it’s the ultimate source of truth—far more reliable than the Coinbase app's status indicator.
All you need is your transaction hash.
The explorer will tell you instantly if the transaction is still pending, if it went through successfully, or if it failed. This gives you definitive proof of what happened, no matter what Coinbase says. Knowing how to do this is a critical skill for anyone who needs to regularly send from Coinbase to a wallet for DeFi.
This is probably the most common (and terrifying) mistake you can make. You sent USDC from Coinbase on the Polygon network, but your MetaMask was set to Ethereum Mainnet. The funds are gone from Coinbase but nowhere to be found in your wallet. Did you just burn your money?
In most cases, no. Modern wallets like MetaMask use the same private key to generate your public address across different EVM-compatible chains (like Ethereum, Polygon, and Base). This means you still control the address where the funds landed—it's just on a different network.
Here’s how you can usually get them back:
This recovery trick works because your wallet address is identical across these compatible chains. Be warned, this isn't a universal rule. If you send assets between totally different blockchains, like from Ethereum to the Bitcoin network, those funds are almost always lost for good.
Given the sheer scale of crypto, these issues are more common than you'd think. Coinbase Wallet alone has 3.2 million monthly active users, and millions of transfers happen every day. Even a minor disruption, like the 3-hour and 17-minute outage in October, can create a backlog of pending transactions and widespread confusion. This is why learning to troubleshoot for yourself is so important.
If a block explorer shows your transaction failed, look for an error message. It often gives you a clue, like "Out of Gas," which just means the fee you paid wasn't high enough to cover the network's demand at that moment.
This confuses everyone because Coinbase has rebranded multiple times. Here's the current state as of 2026:
Coinbase (Consumer App): Simple interface for buying/selling crypto. Higher fees (typically 1.5-3.99%), best for beginners who value simplicity over cost.
Coinbase Pro: This no longer exists. It was rebranded as Coinbase Advanced in 2023.
Coinbase Advanced: Professional trading interface with lower fees (0.05-0.6% maker/taker). Same login as regular Coinbase, but advanced charts and order types. This is what experienced traders use.
Coinbase Wallet: Completely separate app. Non-custodial self-custody wallet. You control the keys. Has nothing to do with your Coinbase exchange account unless you manually link them.
When you withdraw from Coinbase (the exchange), you're moving funds OFF the platform to an external wallet or another exchange. Whether you use the consumer app or Advanced, the withdrawal process is identical.
Confusion arises because "Coinbase Wallet" sounds like it's part of Coinbase exchange, but it's a separate product. You can use Coinbase Wallet without ever creating a Coinbase exchange account.
Not directly. Coinbase only allows you to withdraw to wallet addresses, not to interact with smart contracts.
Here's what this means in practice: You want to deposit USDC into Aave (a lending protocol). You cannot send directly from Coinbase to the Aave smart contract. You must:
This two-step process is required because Coinbase withdrawals are simple transfers, not smart contract interactions. The platform doesn't support approving contracts or complex transactions.
The advantage of this separation: it's actually safer. You review the contract interaction in your wallet before approving it, adding a layer of security. Direct integration would be convenient but would remove your ability to verify what you're approving.
This is a nightmare scenario but it happens. You sent ETH to your old Binance deposit address. Binance closed your account for inactivity. Your ETH is now sent to an address Binance controls, but they claim they can't credit your closed account.
Realistic outcome: Your funds are likely lost unless the exchange is willing to help. Here's why:
Exchanges don't generate unique deposit addresses for each user. They use pooled addresses and track deposits via internal database linking. When you send to "your" Binance address, you're actually sending to Binance's pooled wallet. They credit your account based on matching the transaction to your user ID.
If your account is closed, the matching fails. The crypto still arrived at Binance's wallet, but they have no obligation to credit a closed account.
Prevention:
Verify account status before sending: Log into the destination exchange and confirm your account is active and in good standing.
Update deposit addresses regularly: If you haven't used an exchange in 6+ months, assume the deposit address may have changed. Generate a new one.
Never withdraw to an exchange you don't control: Sending from Coinbase to someone else's exchange deposit address (trying to "gift" crypto) is extremely risky. The recipient's exchange might reject it, and you have zero recourse.
If this happens to you:
Contact the exchange immediately with:
Response rates vary. Large exchanges (Binance, Coinbase) sometimes help. Smaller exchanges often ghost you. There's no guarantee of recovery.
Coinbase processes withdrawals in batches for security and efficiency. A "pending" status on Coinbase means they've received your request but haven't broadcast it to the blockchain yet.
Normal pending times:
Once Coinbase broadcasts the transaction, you'll get a transaction hash. At that point, it's out of their hands and dependent on blockchain confirmation time.
If it's stuck pending for 24+ hours:
Check your email for a verification request. Sometimes Coinbase sends a confirmation link that must be clicked before the withdrawal processes. If you miss this email, the withdrawal sits in pending forever.
Also check for account restrictions. Go to Coinbase Settings → Security and look for any warnings or holds.
If everything looks clear and it's still pending, contact support. Provide the withdrawal request timestamp and amount. They can manually review and push it through if there's no legitimate security flag.
Yes, with limitations. Coinbase supports "send to email" for other Coinbase users. This keeps the transaction on Coinbase's internal ledger (no blockchain fees) and is instant.
But this only works if the recipient has a Coinbase account. If they don't, the transaction goes through a different process:
Coinbase sends them an email saying "Someone sent you crypto!" They have to create a Coinbase account to claim it. If they don't claim it within 30 days, the funds return to you.
For non-Coinbase users:
You must send to their wallet address. Get their public address (from MetaMask, Ledger, etc.) and send directly to it. This incurs normal network fees and confirmation times.
Never ask someone for their "Coinbase wallet address" to send them crypto. This creates confusion. Ask for their "Ethereum wallet address" or "Solana wallet address" depending on what you're sending. This makes it clear you need their self-custody wallet address, not their Coinbase account.
Many beginners try to send "to Coinbase" and end up sending to the wrong address because they're conflating the exchange with wallet addresses.
Ready to turn on-chain data into your next winning trade? Wallet Finder.ai helps you discover and track the most profitable wallets in DeFi. Start your 7-day trial and mirror the moves of top traders today. Find your edge at https://www.walletfinder.ai.

A premier DeFi analytics platform empowering traders to discover and analyze profitable blockchain wallets, trades and tokens.

